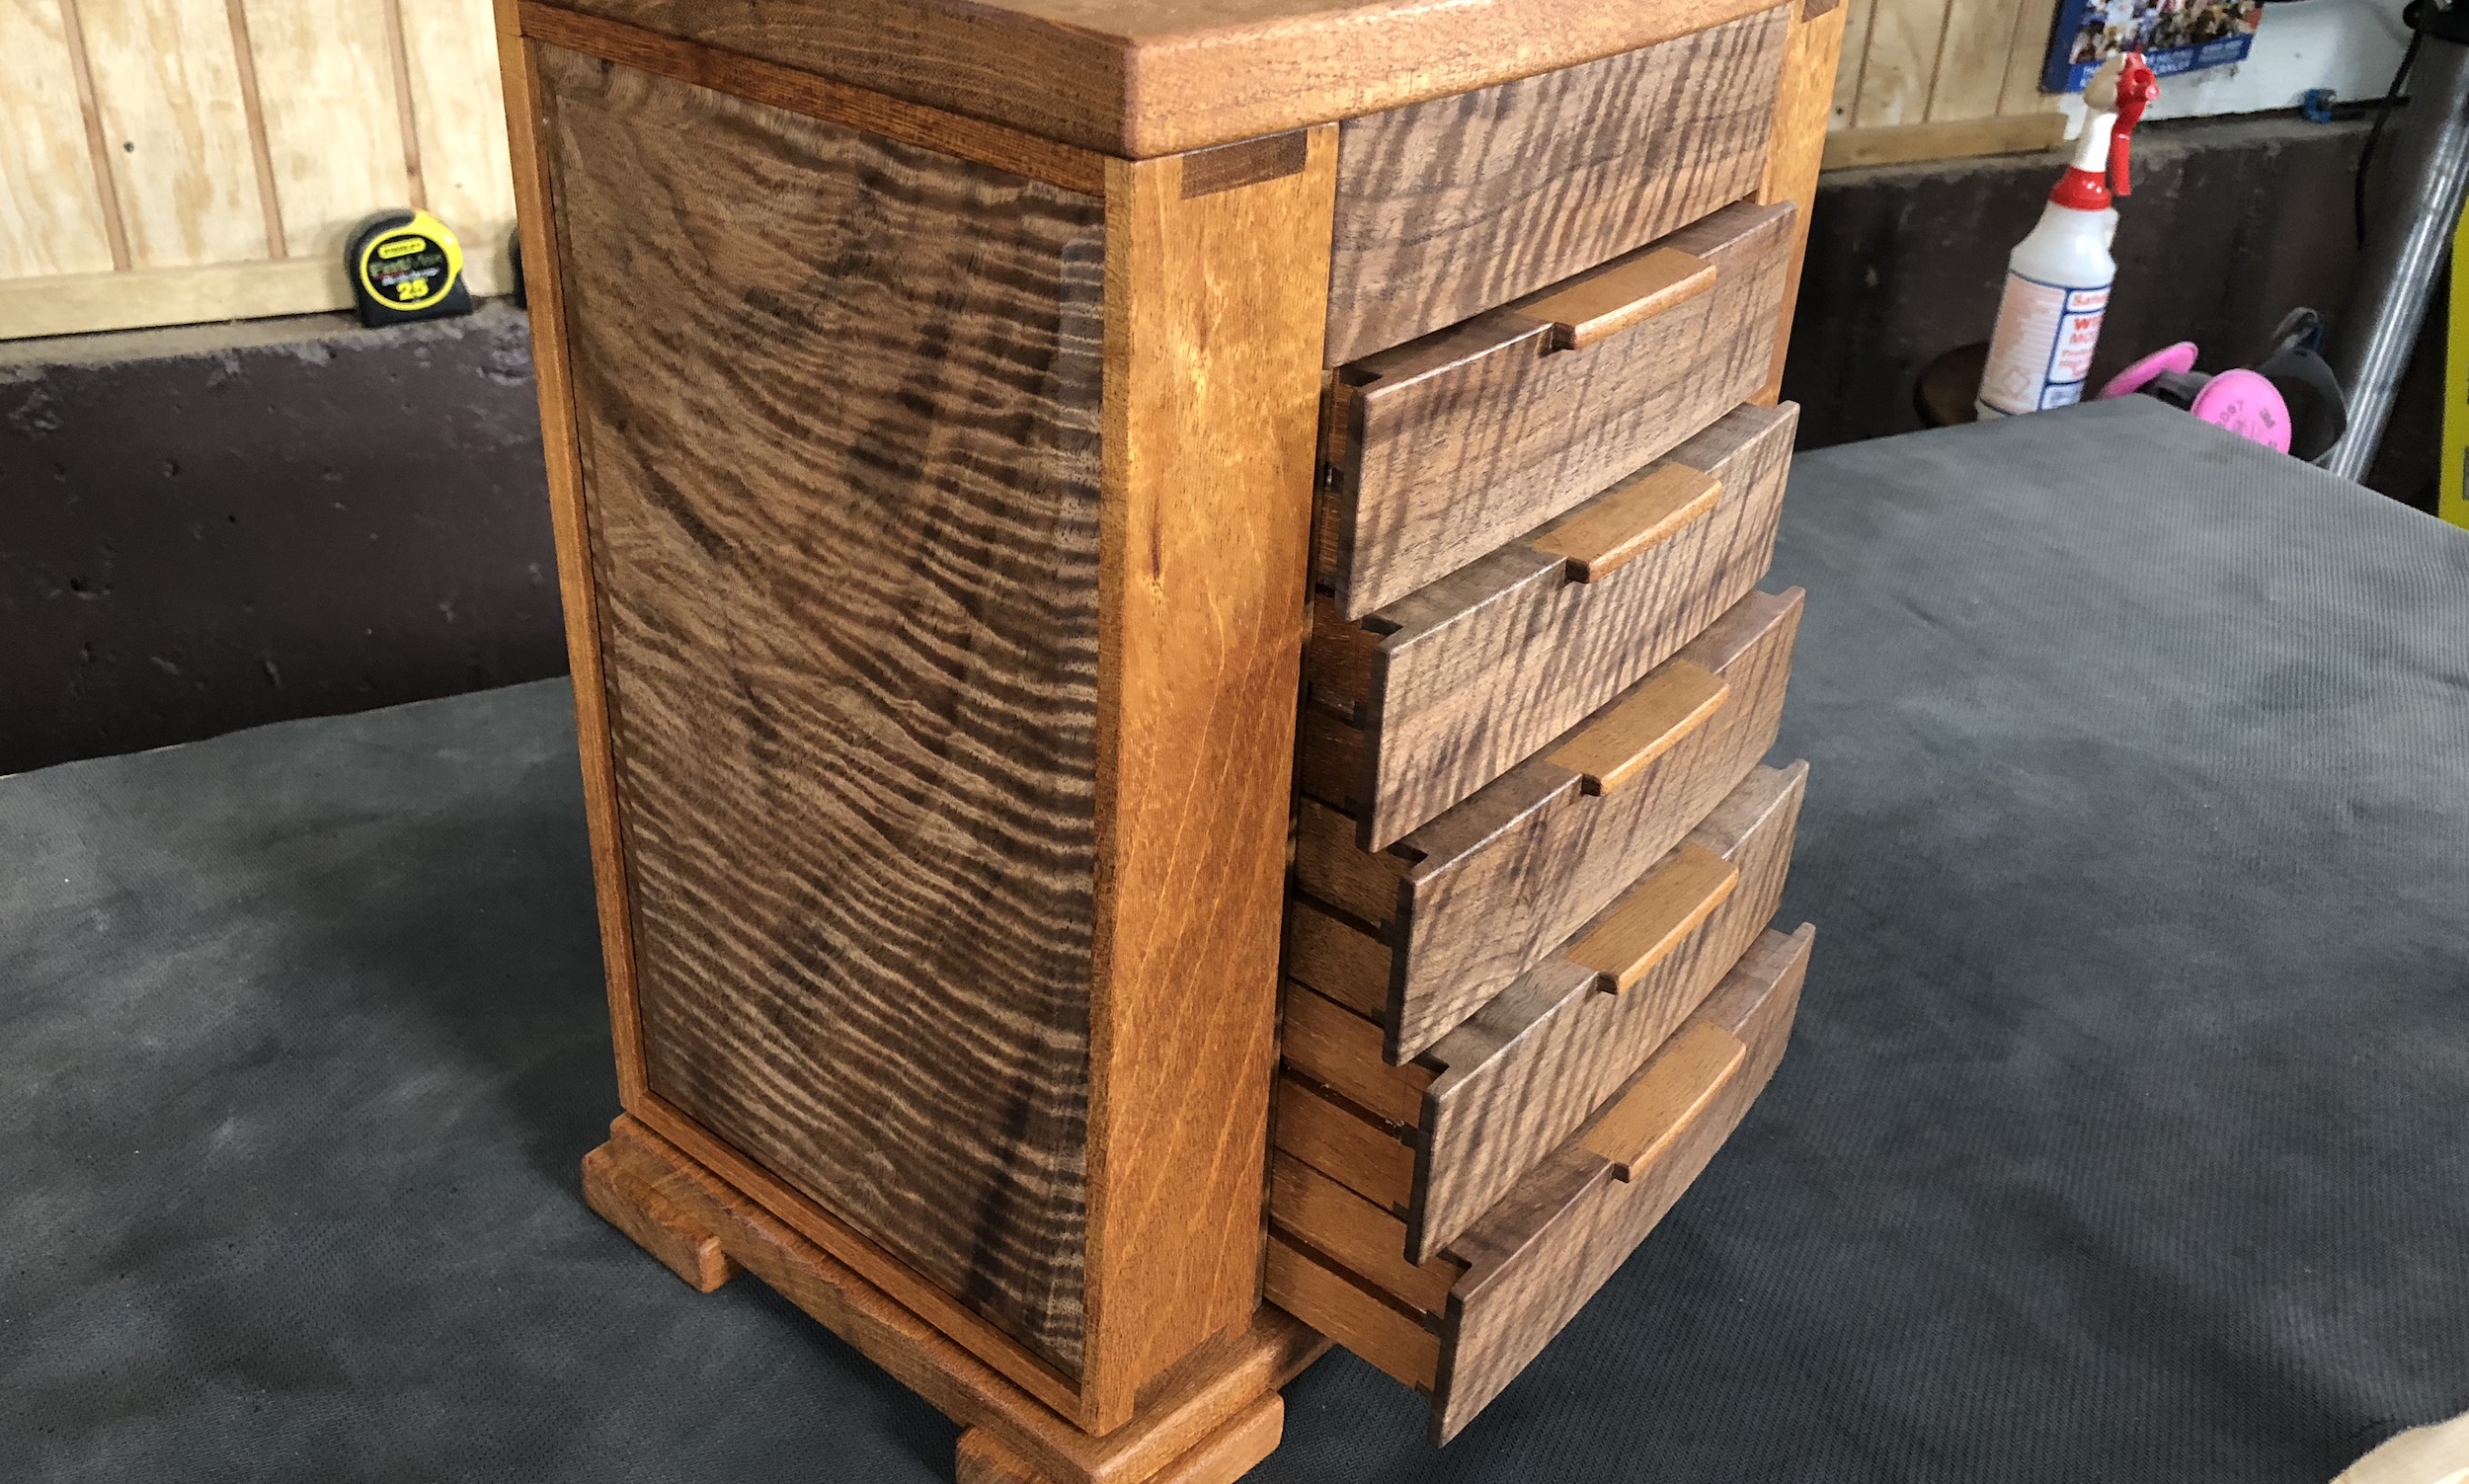
Make your own magic box: a woodworking guide

Make your own magic box: a woodworking guide

Create Your Own Enchanting Magic Box: A Comprehensive Woodworking Guide

Embark on a whimsical woodworking journey and craft your own mesmerizing magic box! This guide will lead you through every step, from selecting the perfect wood to adding a touch of enchantment. Get ready to unleash your creativity and build a magical treasure that will spark wonder and delight.

Gather Your Supplies

Before you dive into the woodworking magic, ensure you have all the necessary tools and materials. This project requires a bit of precision and creativity, so having the right equipment will make the process smoother and more enjoyable.

Wood Selection

Choose a wood that speaks to your artistic vision. For a classic, timeless feel, opt for hardwoods like cherry, maple, or walnut. These woods are known for their durability and rich grain patterns. If you prefer a lighter and more whimsical aesthetic, consider pine, cedar, or birch.

Essential Tools

You'll need a few essential tools to bring your magic box to life:

  • Table saw
  • Miter saw
  • Jig saw
  • Hand saw
  • Sandpaper (various grits)
  • Clamps
  • Wood glue
  • Screwdriver
  • Measuring tape
  • Pencil
  • Safety glasses
  • Dust mask

Feel free to supplement this list with additional tools that you find helpful. Remember, safety first! Always wear safety glasses and a dust mask when working with wood.

Designing Your Magic Box

Now, let your imagination run wild! Sketch out your magic box design on paper. Consider these factors:

  • Size and Shape: Will it be a compact treasure chest or a grand, intricate box?
  • Style: Do you envision a classic, ornate box or something more modern and minimalist?
  • Secret Compartments: Add a touch of mystery with hidden compartments or drawers.
  • Finishing Touches: Think about how you'll embellish your box. Will you use paint, stain, or decorative hardware?

Cutting and Assembly

With your design in hand, carefully transfer it to your wood. Use the table saw and miter saw to make accurate cuts. Take your time and make sure your measurements are precise. Once all the pieces are cut, use wood glue and clamps to assemble your magic box. Allow the glue to dry completely before proceeding.

Adding Magic

This is where the true enchantment begins! Here are some ideas to make your box truly magical:

  • Intricate Carvings: Carve delicate patterns or symbols into the wood to add visual depth and intrigue.
  • Hidden Compartments: Create secret compartments for storing trinkets, letters, or other treasures.
  • Mirror Tiles: Incorporate small mirror tiles into the box's interior to create a captivating optical illusion.
  • Luminous Accents: Add small, battery-operated LED lights to illuminate the interior.

Finishing Touches

Now, it's time to give your magic box its final polish! Sand it down with sandpaper of progressively finer grits, starting with coarse and ending with fine. This will create a smooth and polished surface. Apply a stain or paint to achieve your desired color and finish. Consider adding decorative hardware like hinges, latches, or handles to complete the look.

Unleash Your Magic

Congratulations! You've crafted your own enchanting magic box, a testament to your creativity and woodworking skills. Fill it with your cherished treasures, secrets, or simply the joy of making something unique and special. Enjoy the magic it brings!

Share:

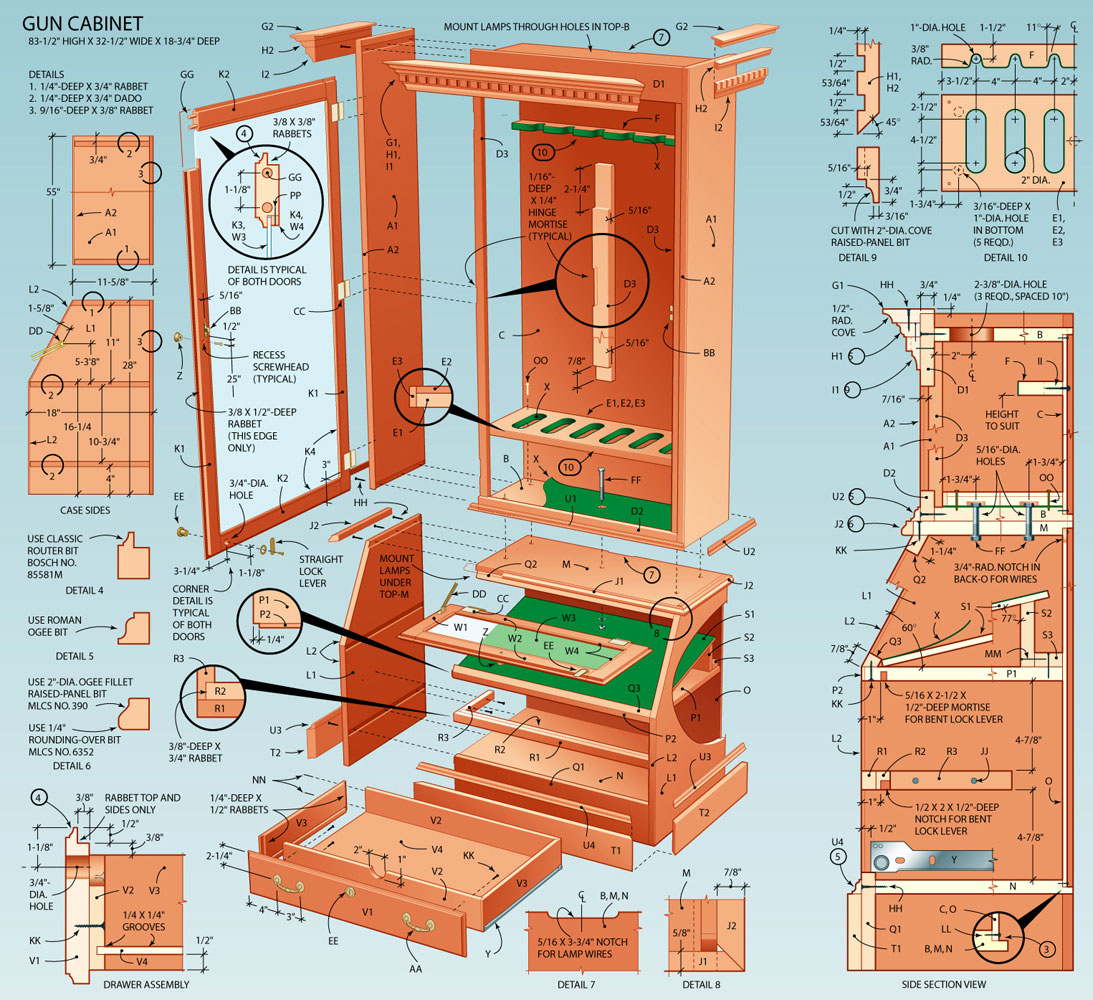
How to build a wooden gun case for a small collection

How to build a wooden gun case for a small collection

Building a Wooden Gun Case for Your Small Collection

A well-crafted wooden gun case not only safeguards your treasured firearms but also adds a touch of elegance and sophistication to your collection. Whether you're a seasoned gun enthusiast or a novice collector, constructing your own gun case can be a rewarding and fulfilling project. With the right tools, materials, and a bit of patience, you can build a custom-made case that perfectly accommodates your firearms and reflects your personal style.

Choosing the Right Wood

The type of wood you choose will significantly impact the look, durability, and cost of your gun case. For a classic and elegant appearance, consider hardwoods like walnut, cherry, or maple. These woods are known for their rich grain patterns and natural resistance to scratches and dents. If you're looking for a more affordable option, softwoods like pine or cedar are also suitable choices. Just keep in mind that softwoods may be less durable and require more careful handling.

Essential Tools and Materials

Before you start building, ensure you have the necessary tools and materials on hand. This includes:

  • Saw (table saw, circular saw, or hand saw)
  • Router
  • Drill press or cordless drill
  • Sandpaper (various grits)
  • Wood glue
  • Clamps
  • Finish (stain, paint, or varnish)
  • Wood screws
  • Hinges
  • Latch or lock
  • Felt or foam padding
  • Measuring tape
  • Pencil or marker

Planning Your Gun Case

Before you start cutting wood, take the time to carefully plan your gun case design. Determine the dimensions based on the size of your firearms and desired storage capacity. Consider the number of compartments you need, whether you want to include dividers, and any additional features such as drawers or compartments for accessories.

Cutting and Assembling the Case

Once you have a detailed plan, you can begin cutting the wood pieces for the case. Accurately cut the sides, bottom, top, and any dividers using your chosen saw. Pay attention to the grain direction for optimal strength and stability. Use wood glue and clamps to securely join the pieces together. Allow the glue to dry completely before moving to the next step.

Adding Finishing Touches

Once the case is assembled, you can begin adding the finishing touches. Sand all surfaces smooth, starting with coarse sandpaper and progressing to finer grits for a smooth finish. You can choose to stain the wood to enhance its natural grain patterns or paint it in a color of your choice. Apply multiple coats of your chosen finish for durability and a polished look.

Interior Padding and Storage

To protect your firearms from scratches and movement, line the interior of the case with felt or foam padding. You can cut the padding to fit snugly around the guns, providing a secure and cushioned environment. Consider adding dividers or compartments within the case to separate different firearms or store accessories such as cleaning supplies or ammunition.

Adding Hardware

The final step is to install the hardware. Attach hinges to the lid and case body, ensuring they are positioned for smooth opening and closing. Install a latch or lock for security and peace of mind. You can also personalize your case by adding decorative elements like brass accents or custom engraved nameplates.

Congratulations! You have now built your own custom wooden gun case. This project will not only enhance your firearms collection but also provide you with a sense of accomplishment and a unique piece of craftsmanship to display.

Share:

How to build a magic box: woodworking tutorial

How to build a magic box: woodworking tutorial

Building a Magical Wooden Box: A Woodworking Tutorial

Prepare to be enchanted! This woodworking project guides you step-by-step to craft a beautiful and functional wooden box. Perfect for storing treasures, secrets, or even magical trinkets, this box will be a unique addition to your home or a special gift. We'll guide you through every stage, from choosing your wood to applying the finishing touches. Grab your tools, let's get started!

Materials You'll Need

Before we begin, gather all your materials to ensure a smooth woodworking experience:

  • Wood: Choose a sturdy wood like oak, maple, or cherry. Consider the look and feel you want for your box. For a more rustic style, use reclaimed wood.
  • Wood Glue: A high-quality wood glue is essential for strong joints.
  • Screws: Use screws that are appropriate for the thickness of your wood.
  • Hinges: Select decorative hinges that complement your box's style. These will add visual appeal and ensure the box opens and closes smoothly.
  • Latch or Lock: Choose a latch or lock that suits your box's purpose and aesthetic. A simple latch or a decorative lock can add a touch of intrigue.
  • Sandpaper: You'll need different grit sandpaper for smoothing and finishing your box. Start with a coarse grit, gradually moving to finer grits.
  • Wood Stain or Paint: Optional, but consider adding a stain or paint for a personalized touch.
  • Finishing Oil or Wax: To protect and enhance the beauty of your wood, use a finishing oil or wax.
  • Measuring Tape, Pencil, Ruler, and Cutting Guide: For accurate measurements and marking.
  • Safety Glasses and Dust Mask: Protect your eyes and lungs while working with wood.

Step 1: Design and Planning

Before you grab your saw, take some time to design your box. This step is crucial to ensure you create something you'll love.

  • Dimensions: Determine the desired length, width, and height of your box. This will affect the amount of wood you need.
  • Style: Choose a style that resonates with you. You can opt for a simple rectangular box or add intricate details like moldings or decorative inlays.
  • Lid: Decide whether you want a hinged lid or a removable top. This will influence the construction process.
  • Hardware: Consider what type of hinges, latch, or lock you want. Look for ones that align with your design aesthetic.
  • Sketch: Draw a rough sketch of your box to visualize the final product.

Step 2: Cutting the Wood

Now comes the fun part! With your design in mind, you're ready to start cutting your wood. Take your time, measure twice, and cut once!

  • Cut the Base and Sides: Use a saw or table saw to accurately cut the pieces for the base and sides of your box. Remember to account for the thickness of the wood when determining the dimensions.
  • Cut the Lid: If you're creating a hinged lid, cut the lid piece slightly larger than the base to allow for proper fitting.

Step 3: Assembling the Box

With all your pieces cut, you're ready to assemble the box. Focus on creating strong and precise joints.

  • Join the Sides to the Base: Use wood glue and screws to attach the sides to the base of the box. Clamp the pieces together and ensure they are flush and square.
  • Attach the Lid: If you are using a hinged lid, attach the hinges to the lid and the box using screws. Ensure the hinges are aligned and allow the lid to open and close smoothly.
  • Install the Latch or Lock: Follow the manufacturer's instructions for attaching the latch or lock. This step will secure your precious contents.

Step 4: Sanding and Finishing

Once your box is assembled, it's time to refine its look and feel.

  • Sanding: Use sandpaper to smooth the box's surfaces, edges, and corners. Start with a coarse grit, gradually moving to finer grits to achieve a polished finish.
  • Finishing: Apply a stain or paint if desired, following the manufacturer's instructions. Allow the finish to dry completely before moving on.
  • Apply Finishing Oil or Wax: To protect the wood and enhance its natural beauty, apply a finishing oil or wax. Rub the oil or wax evenly into the wood and let it dry completely.

Step 5: Adding Your Personal Touch

Now for the magical touch! This is where you can truly make your box unique.

  • Inlay or Carving: Consider adding decorative inlays or carvings to elevate the box's aesthetic.
  • Hardware: Use decorative hinges, latches, or locks to add visual interest and enhance the box's character. This is your chance to add a touch of magic!
  • Interior Lining: Line the inside of the box with fabric, velvet, or a decorative paper to add a touch of luxury and create a special environment for your treasures.

And there you have it! Your beautifully crafted magic box is ready to be filled with secrets, treasures, or a touch of enchantment. Enjoy your new woodworking masterpiece and the joy it brings to your home.

Share:

Diy guide to building a wooden gun cabinet for your collection

Diy guide to building a wooden gun cabinet for your collection
Share:

Build a unique magic box: diy woodworking project guide

Build a unique magic box: diy woodworking project guide

Building a Unique Magic Box: A DIY Woodworking Project Guide

This guide will provide you with the step-by-step instructions you need to build your own unique magic box. This project is designed to engage your woodworking skills and unleash your creativity, resulting in a captivating piece that's both functional and aesthetically pleasing.

Beyond the basic woodworking techniques, you'll also learn how to incorporate secret compartments, hidden mechanisms, and intriguing design elements that will make your magic box truly special. This project offers a fantastic opportunity to bring your imagination to life, creating a piece that sparks wonder and surprise in anyone who encounters it.

Materials and Tools

To build your magic box, you'll need the following materials:

  • Wood: Choose a wood type that suits your aesthetic preferences and project requirements. Consider hardwoods like maple, cherry, or walnut for their durability and elegant grain patterns. Softwoods like pine or cedar are also suitable and offer a more affordable option. For the box's base, you'll need a piece of wood at least 1/2 inch thick.
  • Plywood: For the box's sides and top, choose a plywood thickness that provides stability while allowing for easy manipulation. A thickness of 1/4 inch or 1/2 inch is generally sufficient.
  • Hinges: Select hinges that are strong enough to support the weight of the box's lid and are aesthetically compatible with the wood you've chosen. Brass, nickel, and black hinges are popular options.
  • Latch: A latch helps secure the box and adds a touch of elegance. Opt for a design that aligns with your overall aesthetic.
  • Wood glue: Use a high-quality wood glue for strong, durable bonds.
  • Wood screws: Select screws that are appropriate for the thickness of your wood and are resistant to rust or corrosion.
  • Sandpaper: A range of sandpaper grits (from coarse to fine) is needed for smoothing the wood and creating a smooth surface.
  • Wood stain and finish: Choose a stain and finish that complement the wood type and your desired aesthetic. Consider options like oil-based stains, water-based stains, varnishes, polyurethanes, and waxes.
  • Optional: Decorative elements like inlays, carvings, or metal accents can further enhance your magic box.

In addition to the materials, you'll need the following tools:

  • Table saw or circular saw
  • Mitre saw or hand saw
  • Drill and drill bits
  • Screwdriver
  • Clamps
  • Measuring tape and pencil
  • Safety glasses and gloves

Step-by-Step Construction Guide

Step 1: Design and Planning

Before you begin cutting wood, carefully design your magic box. Consider its size, shape, and the specific features you want to incorporate. Sketch out a detailed blueprint or use a computer-aided design (CAD) program to visualize your design.

Think about the following:

  • Size and Shape: Determine the overall dimensions of your box. Consider the purpose of the box and the items you intend to store within it.
  • Hidden Compartments: Plan the location and size of any hidden compartments within the box. Consider creating sliding drawers, concealed doors, or even a false bottom.
  • Secret Mechanisms: Design mechanisms to reveal these compartments, such as levers, buttons, or magnetic releases.
  • Aesthetics: Choose a style that reflects your taste and the overall theme of the box. Incorporate decorative elements like inlays, carvings, or metal accents.

Step 2: Cutting the Wood

Using your design as a guide, cut the pieces of wood to the specified dimensions. Ensure precise cuts for a professional finish.

  • Base: Cut a piece of wood to serve as the base of your box. Ensure it's large enough to accommodate the sides and lid.
  • Sides: Cut four pieces of plywood to form the sides of the box. These pieces should be equal in height and length to fit snugly against the base and each other.
  • Top: Cut a piece of plywood to serve as the lid of your box. The top should be slightly larger than the base to allow for a snug fit and prevent the lid from falling in.

Step 3: Assembling the Box

Begin assembling the box by joining the sides to the base.

  • Attaching the Sides: Apply wood glue along the edges of the base where the sides will be attached. Secure the sides to the base using clamps. Allow the glue to dry completely before removing the clamps.
  • Adding the Top: Once the sides are secured, attach the top using hinges. If your design includes a hidden compartment or mechanism, ensure it's incorporated during this step.
  • Reinforcing Joints: For added strength, you can reinforce the joints by drilling pilot holes and securing the pieces with wood screws.

Step 4: Incorporating Hidden Compartments and Mechanisms

Now it's time to add those intriguing hidden compartments and mechanisms that will transform your box into a magical creation.

  • Sliding Drawer: Create a sliding drawer by cutting a piece of plywood to fit inside the box. Attach a handle or a pull to the front. Include a track system to allow the drawer to slide smoothly in and out.
  • Concealed Door: Design a concealed door that blends seamlessly with the surrounding wood. Attach it using hinges and install a magnetic catch to keep it secure.
  • False Bottom: A false bottom can be created by attaching a second layer of plywood to the bottom of the box, leaving a concealed space beneath it.
  • Secret Mechanism: Incorporate a lever, button, or magnetic release to trigger the opening of hidden compartments.

Step 5: Finishing Touches

Once the box is assembled, it's time to enhance its appearance and protect its surface.

  • Sanding: Sand the entire box with a range of sandpaper grits, starting with a coarse grit to remove any rough edges and ending with a fine grit for a smooth finish.
  • Staining: If desired, apply a wood stain to enhance the color and grain patterns of the wood. Allow the stain to dry completely.
  • Finishing: Apply a protective finish, such as a varnish or polyurethane, to seal the wood and provide a durable surface.

Step 6: Adding Decorative Elements

Elevate the aesthetic appeal of your magic box by adding decorative elements. Consider incorporating:

  • Inlays: Use contrasting wood species, decorative materials like mother-of-pearl, or even metal accents to create eye-catching inlays.
  • Carvings: Carve intricate designs into the wood surface to add texture and visual interest.
  • Metal Accents: Incorporate decorative metal accents like corner pieces, handles, or hinges for an elegant touch.

Tips and Techniques

  • Precision: Ensure precise measurements and cuts for a professional finish.
  • Safety First: Always wear safety glasses and gloves when using power tools.
  • Dry Fitting: Before applying glue, dry fit the pieces to ensure a proper fit and avoid gaps.
  • Clamping: Use clamps to securely hold the pieces in place while the glue dries.
  • Sanding Technique: Sand with the grain to avoid scratches and ensure a smooth surface.
  • Finishing: Apply multiple thin coats of finish for a durable and even application.

Ideas for Unique Magic Box Features

Here are some ideas for unique features you can incorporate into your magic box to make it truly extraordinary:

  • Secret Compartment Under the Lid: Create a hidden compartment under the lid of the box, accessed by a hidden latch or a magnetic release.
  • Hidden Shelf: Design a shelf that slides out from the back of the box, revealing a secret compartment.
  • Puzzle Lock: Incorporate a puzzle lock that requires a specific sequence of movements to open the box.
  • Light-Up Mechanism: Install LEDs or fiber optic cables to create a magical glow within the box.
  • Hidden Message: Conceal a secret message within the box, revealed only by a specific action or sequence of events.

Conclusion

Building a unique magic box is a fulfilling woodworking project that allows you to combine craftsmanship, creativity, and a touch of magic. With careful planning, precise execution, and a dash of imagination, you can craft a truly extraordinary piece that's both functional and enchanting. So, gather your tools, choose your wood, and let your creative spirit guide you as you embark on this magical woodworking journey.

Share:

Diy guide to creating a concealed in-wall gun cabinet

Diy guide to creating a concealed in-wall gun cabinet


Introduction:

Securing firearms within the home is paramount for responsible gun ownership. While traditional gun safes provide reliable storage, they can be bulky and obtrusive. A concealed in-wall gun cabinet offers a discreet and aesthetically pleasing solution, seamlessly integrating with your home's decor while keeping your firearms secure. This guide provides a comprehensive, step-by-step approach to constructing a concealed in-wall gun cabinet, encompassing planning, materials, construction, and installation.

I. Planning and Design

A. Location Selection:

1. Accessibility: Choose a location easily accessible to you but hidden from unauthorized access. Consider a closet, pantry, or a wall in a less frequented room.
2. Structural Integrity: Assess the wall's structural integrity. Ensure the wall can support the weight of the cabinet and its contents. Avoid load-bearing walls or walls containing electrical wiring or plumbing.
3. Concealment: Select a location that allows for seamless integration of the cabinet with the surrounding environment. This could involve disguising it as a bookshelf, a decorative panel, or a piece of furniture.

B. Cabinet Design:

1. Dimensions: Determine the cabinet's dimensions based on the number and size of firearms you intend to store. Consider the required storage space for ammunition, cleaning supplies, and other accessories.
2. Door Design: Select a door design that blends with the surrounding décor. Options include flush doors, recessed doors, or doors mimicking existing furniture.
3. Security Features: Include security features like a sturdy door frame, heavy-duty hinges, and high-quality lock mechanisms. Consider incorporating a locking mechanism with a biometric reader or keyless entry system.
4. Interior Organization: Design the interior compartments to efficiently organize your firearms, ammunition, and accessories. Include shelves, drawers, or other organizers as needed.

II. Materials and Tools

A. Materials:

1. Framing Lumber: Use durable, treated lumber like pressure-treated pine or redwood for the cabinet's frame.
2. Sheathing: Choose plywood, MDF, or other solid materials for the cabinet's walls and shelves.
3. Door Material: Opt for solid wood, plywood, or MDF for the door, depending on the desired design.
4. Hardware: Include hinges, door locksets, handles, shelf supports, and fasteners. Choose high-quality, tamper-resistant hardware.
5. Finish: Select a finish that complements the surrounding décor. This could involve painting, staining, or applying a decorative veneer.

B. Tools:

1. Power Tools: A circular saw, drill, jigsaw, sander, and impact driver are essential.
2. Hand Tools: Include a hammer, level, tape measure, pencil, and combination square.
3. Safety Gear: Wear safety glasses, gloves, and hearing protection during construction.

III. Construction

A. Framing and Sheathing:

1. Framing the Cabinet: Construct the cabinet's frame using the chosen lumber. Ensure the frame is square and plumb.
2. Sheathing the Cabinet: Attach the chosen sheathing to the frame, creating the cabinet's walls. Securely fasten the sheathing using screws or nails.
3. Interior Shelves: Install shelves and dividers within the cabinet to create organized storage compartments.
4. Door Frame: Install the door frame, ensuring it is flush with the cabinet's frame.

B. Door Construction:

1. Door Panel: Build the door panel using the chosen material. Ensure the door is thick enough for added security.
2. Door Hinges: Attach heavy-duty hinges to the door frame and the door panel.
3. Door Lockset: Install a high-quality, tamper-resistant lockset on the door. Choose a lockset with a deadbolt mechanism for added security.

C. Finishing and Installation:

1. Finishing the Cabinet: Sand the cabinet's surfaces smooth, then apply the chosen finish. This could involve painting, staining, or applying a decorative veneer.
2. Installing the Cabinet: Carefully install the cabinet within the wall cavity. Secure the cabinet to the wall studs for stability.
3. Concealing the Cabinet: Blend the cabinet with the surrounding environment by adding decorative elements like a bookshelf, a decorative panel, or a piece of furniture.

IV. Security Considerations

A. Lock Selection:

1. Deadbolt Mechanism: Ensure the chosen lockset includes a deadbolt mechanism for enhanced security.
2. Tamper-Resistant Hardware: Select hardware specifically designed to resist tampering and forced entry.
3. Biometric Readers or Keyless Entry: Consider installing a biometric reader or keyless entry system for enhanced security and user convenience.

B. Additional Security Features:

1. Motion Sensors: Install motion sensors to detect unauthorized access to the cabinet's location.
2. Alarm Systems: Integrate the cabinet's lock mechanism with a home alarm system to trigger an alarm in case of unauthorized access.
3. Security Cameras: Install security cameras in the vicinity of the cabinet to capture any suspicious activity.

V. Conclusion

Building a concealed in-wall gun cabinet offers a discreet and secure way to store firearms within your home. By carefully planning, selecting quality materials, and implementing robust security measures, you can create a concealed storage solution that meets your specific needs and ensures the safety of your firearms. Remember to always follow local and state regulations regarding firearm storage and safety.

Disclaimer:

This guide is intended for informational purposes only. The information provided does not constitute professional advice, and readers are encouraged to seek professional guidance before undertaking any construction or installation projects. It is crucial to comply with all local building codes and regulations. Always prioritize safety and seek professional help when necessary.

Share:

How to assemble a wooden clock kit for beginners

How to assemble a wooden clock kit for beginners


Embarking on a DIY project can be both rewarding and enriching. Crafting a wooden clock from a kit is a particularly fulfilling endeavor, offering the satisfaction of creating something beautiful and functional with your own hands. This comprehensive guide will equip you with the knowledge and confidence to assemble your wooden clock kit, regardless of your experience level.

Step 1: Gather Your Materials and Tools

Before diving into the assembly process, ensure you have all the necessary materials and tools readily available. Your wooden clock kit should include:

Wooden components: This typically includes the clock face, hands, movement mechanism, and any decorative elements.
Hardware: Screws, nuts, bolts, and washers for securing the clock's components.
Instructions: A detailed guide outlining the assembly process.

You will also need the following tools:

Screwdriver: Choose a size suitable for the screws included in the kit.
Pliers: For gripping and manipulating small components.
Scissors or a utility knife: For cutting packaging materials.
Pencil: For marking and aligning components.
Hammer: (Optional) for gently tapping components into place.
Sandpaper: (Optional) for smoothing any rough edges or imperfections.
Wood glue: (Optional) for additional stability and a polished look.

Step 2: Carefully Examine the Components

Before starting assembly, take the time to familiarize yourself with the various components of the clock kit. Carefully examine each piece, paying attention to their shape, size, and any markings or labels. This step will prevent confusion and ensure you understand the intended placement of each component.

Step 3: Follow the Instructions Meticulously

Your clock kit will include detailed instructions outlining the assembly process. Read these instructions thoroughly before starting, understanding each step and its significance. The instructions are your blueprint for creating a functional and beautiful clock.

Step 4: Start with the Base and Clock Face

Most clock kits typically begin with assembling the base and attaching the clock face. Carefully align the base components and secure them using the provided screws or glue. Ensure the clock face is properly positioned and attached, as this forms the foundation for the rest of the assembly.

Step 5: Install the Movement Mechanism

The movement mechanism is the heart of your clock, housing the gears and motor responsible for keeping time. Carefully install the movement mechanism according to the instructions, ensuring it is securely fastened to the base or clock face.

Step 6: Attach the Hands

Once the movement mechanism is secured, it's time to attach the hands. The instructions will clearly indicate which hand goes where - hour, minute, and potentially a second hand. Secure the hands to the movement mechanism with the provided pins or screws.

Step 7: Set the Time

Now that your clock is assembled, set the time using the crown or knob located on the movement mechanism. Most clock kits provide a detailed guide on how to set the time accurately.

Step 8: Add Decorative Elements

Many clock kits include decorative elements such as numerals, embellishments, or a glass cover for the clock face. Follow the instructions to carefully install these elements, enhancing the visual appeal of your finished clock.

Step 9: Test the Functionality

Once your clock is assembled, test its functionality. Ensure the hands move smoothly and accurately. If you notice any issues, revisit the instructions and carefully check the assembly process.

Step 10: Hang or Display Your Clock

The final step involves hanging or displaying your newly assembled clock. Depending on the design, your clock may come with a hanger or require a separate mounting system. Choose a prominent spot in your home to showcase your handiwork.

Tips for Beginners:

Read the instructions thoroughly: Understanding each step before you begin is crucial.
Take your time: Don't rush the process. Be patient and meticulous in your assembly.
Use appropriate tools: Ensure you have the right tools for each step.
Start with smaller, simpler projects: If you are new to woodworking, try a simpler project first before tackling a complex clock kit.
Practice makes perfect: The more you assemble kits, the more proficient you'll become.

Troubleshooting Common Problems:

Hands not moving: Check the movement mechanism's battery or power source. Ensure the hands are properly attached and the movement mechanism is functioning correctly.
Clock losing or gaining time: This could be due to the movement mechanism needing calibration or a battery replacement. Consult the instructions or contact the manufacturer for assistance.
Misaligned components: Carefully re-examine the instructions and ensure all components are properly aligned and secured.

Conclusion:

Assembling a wooden clock kit is a rewarding experience that combines craftsmanship, precision, and a touch of creativity. By following these steps and tips, you can successfully build a beautiful and functional timepiece to enhance your home decor. Remember, patience, meticulousness, and a passion for DIY are your allies on this exciting journey. Enjoy the process and celebrate the satisfaction of creating something with your own hands.

Share:

Postingan Populer

Search This Blog

Powered by Blogger.

Recent Posts

Pages

Theme Support