How to Build Wooden Outdoor Benches with a Durable, Weather-Resistant Coating

How to Build Wooden Outdoor Benches with a Durable, Weather-Resistant Coating

Building Durable, Weather-Resistant Wooden Outdoor Benches

Outdoor benches provide a charming and functional addition to any garden, patio, or deck. With the right construction techniques and a durable finish, you can create a bench that will withstand the elements for years to come. This article will guide you through the process of building a sturdy wooden bench and applying a weather-resistant coating to protect it from the sun, rain, and harsh weather conditions.

Choosing the Right Wood

The choice of wood plays a crucial role in the longevity of your bench. Opt for hardwoods like cedar, redwood, or teak, known for their natural resistance to rot, insects, and weathering. These woods will last longer outdoors and require less maintenance.

Cedar

Cedar boasts a rich, reddish-brown color and emits a pleasant aroma. It naturally resists rot, insects, and moisture, making it a top choice for outdoor furniture.

Redwood

Redwood is another excellent choice, known for its distinctive reddish hue and exceptional durability. Its natural oils provide excellent protection against the elements.

Teak

Teak is renowned for its strength, durability, and natural oil content, making it a premium option for outdoor furniture. It develops a beautiful silver-gray patina over time, adding to its character.

If you prefer a more affordable option, consider pressure-treated pine or spruce. These woods are treated with chemicals to make them resistant to rot and insects, but they may require more frequent maintenance.

Designing Your Bench

Before you begin construction, carefully consider the design and size of your bench.

Dimensions

Measure the space where you plan to place the bench and determine the desired length and width.

Style

Explore various bench styles, from simple straight benches to curved designs with arms or backs. You can find inspiration online or in design books.

Construction Plan

Draw a detailed plan or find a free online blueprint that suits your needs. A well-thought-out plan will help you visualize the final product and streamline the construction process.

Gathering Materials and Tools

Once you have a design and plan, gather the necessary materials and tools. Here's a list of common items you will need:

  • Wooden lumber, based on your design and dimensions
  • Wood screws or bolts
  • Wood glue
  • Measuring tape
  • Level
  • Circular saw or hand saw
  • Drill with bits suitable for wood
  • Clamps
  • Safety glasses and gloves
  • Weather-resistant coating (paint, stain, or sealant)
  • Paintbrush or sprayer

Construction Process

With all your materials and tools ready, follow these steps to build your bench:

Cut the Lumber

Use your saw to cut the lumber according to your plan. Measure twice and cut once to ensure accurate dimensions.

Assemble the Frame

Start by assembling the frame of the bench. Join the pieces together using wood screws, bolts, or glue, depending on your design. Use clamps to secure the pieces while they bond.

Construct the Seat and Back

Attach the seat boards to the frame, making sure they are level and evenly spaced. If your design includes a back, attach it to the frame in the same manner.

Sand the Surface

Once the bench is assembled, sand the entire surface to remove any rough edges or splinters. This will ensure a smooth and comfortable finish.

Applying a Durable, Weather-Resistant Coating

A proper weather-resistant coating is essential to protect your bench from the elements and extend its lifespan. Here's a guide to choosing and applying the right coating:

Choosing a Coating

There are various options for weather-resistant coatings, each with its own advantages and disadvantages.

  • Paint provides a durable, colorful finish and can be easily refreshed when needed.
  • Stain allows the natural grain of the wood to show through while providing protection against the elements.
  • Sealant creates a protective barrier that repels water and moisture.

Consider the desired look, level of protection, and ease of maintenance when selecting a coating.

Applying the Coating

Follow the manufacturer's instructions for preparing and applying the coating. Generally, you will need to clean the bench surface, apply the coating in thin, even coats, and allow it to dry completely between coats.

Maintenance

Depending on the type of coating and the amount of exposure to the elements, your bench may require regular maintenance.

  • Paint may need touch-ups or a complete repaint every few years.
  • Stained benches may need to be restained every few years to maintain their color and protection.
  • Sealant typically needs to be reapplied every year or two.

Regular cleaning and occasional maintenance will help your bench last longer and keep it looking its best.

Finishing Touches

Once the coating is dry, you can add finishing touches to personalize your bench:

  • Hardware: Consider adding decorative hardware like hinges, latches, or bolts to enhance the design.
  • Cushions: Add cushions for extra comfort.
  • Plants: Place potted plants or flowers around the bench to create a vibrant and inviting setting.

Enjoy your new, durable outdoor bench, knowing that it will provide a comfortable and stylish seating option for years to come.

Share:

How to Make a Wooden Christmas Lantern

How to Make a Wooden Christmas Lantern

Crafting a Festive Wooden Christmas Lantern: A Step-by-Step Guide

Embrace the warmth and charm of the holiday season with a handcrafted wooden Christmas lantern. This project offers a unique opportunity to express your creativity and bring a touch of rustic elegance to your festive decor. From selecting materials to assembling the lantern, this guide will walk you through every step of the process, empowering you to create a truly one-of-a-kind piece.

Gathering the Essentials

Before embarking on your lantern crafting journey, ensure you have the necessary tools and materials readily available. This will make the process seamless and enjoyable.

Materials

  • Wooden Boards: Choose sturdy, smooth wooden boards for the lantern's base, sides, and top. Pine, cedar, or birch are excellent options for their natural beauty and ease of working with.
  • Wooden Dowels: Opt for dowels of appropriate thickness to create the lantern's frame.
  • Sandpaper: Use various grits of sandpaper to achieve a smooth finish on the wooden surfaces.
  • Wood Glue: Strong wood glue is essential for securing the various components of the lantern.
  • Screws: Select screws of appropriate size and length to reinforce the structure.
  • Decorative Hardware: Add a touch of whimsy with decorative hinges, latches, or knobs.
  • Paint or Stain: Personalize the lantern with your preferred color or wood stain.
  • LED Tea Lights: Choose battery-operated LED tea lights for a safe and flicker-free glow.

Tools

  • Saw: Use a hand saw or a miter saw to cut the wooden boards to size.
  • Drill: A drill with various drill bits will be needed for creating pilot holes and attaching hardware.
  • Screwdriver: A screwdriver or drill driver will be helpful for securing the screws.
  • Clamps: Clamps will ensure a secure bond while the glue dries.
  • Measuring Tape: Accuracy in measurements is crucial for a well-proportioned lantern.
  • Pencil: Use a pencil for marking the wood before cutting or drilling.
  • Safety Glasses: Always protect your eyes while working with woodworking tools.

Crafting the Lantern Base

The base of the lantern provides a stable foundation for the entire structure. Its size will determine the overall dimensions of the lantern.

  1. Determine Base Size: Decide on the desired width and length of the lantern base. Measure and mark the wooden board accordingly.
  2. Cut the Base: Use a saw to carefully cut the board along the marked lines. Smooth any rough edges with sandpaper.
  3. Sand the Base: Thoroughly sand the base to ensure a smooth surface, removing any splinters or imperfections.

Constructing the Lantern Sides

The lantern sides are the most visually prominent component. The design and shape of the sides will largely define the lantern's aesthetic.

  1. Design the Sides: Determine the desired height and width of the lantern sides. You can choose to create rectangular sides for a classic look or experiment with other geometric shapes like triangles or trapezoids.
  2. Cut the Side Panels: Using a saw, accurately cut the wooden boards according to your design. For intricate shapes, it might be helpful to use a jigsaw.
  3. Sand the Sides: Sand each side panel thoroughly to achieve a smooth, polished surface.

Assembling the Lantern Frame

The frame provides structural support for the lantern and helps to create its distinct silhouette.

  1. Cut Dowels: Measure and cut wooden dowels to the desired length for the frame. Ensure the dowels are long enough to extend beyond the sides of the lantern.
  2. Attaching Dowels: Drill pilot holes on the base and side panels where the dowels will be attached. Apply wood glue to the dowels and insert them into the drilled holes. Secure them with screws.
  3. Reinforce the Frame: Consider adding additional dowels or wooden supports to enhance the frame's stability, especially if the lantern will be hanging.

Creating the Lantern Top

The lantern top serves as the lid and adds the finishing touch to the overall design.

  1. Cut the Top: Measure and cut a piece of wood to create the lantern top. The top should fit snugly over the frame, leaving a slight overhang for a secure fit.
  2. Sand the Top: Smooth any rough edges on the top with sandpaper.
  3. Decorative Touches: Consider adding decorative elements to the top, such as a small handle for opening and closing the lid or a decorative knob.

Finishing Touches

After the lantern is assembled, it's time to add the final touches that will enhance its beauty and functionality.

  1. Painting or Staining: Apply your chosen paint or stain to the entire lantern, ensuring even coverage. Allow the paint or stain to dry completely before proceeding.
  2. Adding Hardware: Attach decorative hinges, latches, or knobs for a touch of personality and functionality.
  3. Finishing Touches: Once the paint or stain has dried, add a layer of varnish or sealant to protect the wooden surface.

Illuminating the Lantern

The moment of truth has arrived! It's time to bring your wooden lantern to life with the warm glow of LED tea lights.

  1. Insert LED Lights: Place the LED tea lights inside the lantern, ensuring they are centered and secure.
  2. Enjoy the Ambiance: Turn on the LED lights and admire the soft, inviting glow emanating from your handcrafted Christmas lantern.

Tips for Success

To ensure a successful lantern crafting experience, consider these helpful tips:

  • Plan Ahead: Sketch a design for the lantern, including its dimensions and features, before starting to cut materials.
  • Measure Twice, Cut Once: Precision is key in woodworking. Double-check your measurements to avoid errors.
  • Use Safety Gear: Always wear safety glasses and appropriate protective gear when working with woodworking tools.
  • Let Glue Dry Thoroughly: Allow the wood glue to dry completely before proceeding to the next step.
  • Sanding is Essential: Sanding the wooden surfaces ensures a smooth finish and a more professional look.
  • Get Creative: Feel free to experiment with different designs, decorative elements, and paint or stain colors.

Crafting a wooden Christmas lantern is a rewarding project that allows you to express your creativity and create a beautiful and functional piece of holiday decor. By following these step-by-step instructions and incorporating your personal touches, you can bring a warm and inviting glow to your home this holiday season. May your lantern project be filled with joy, laughter, and the magic of the festive season!

Share:

How to Build Outdoor Benches That Are Built to Last and Resist the Elements

How to Build Outdoor Benches That Are Built to Last and Resist the Elements

How to Build Outdoor Benches That Are Built to Last and Resist the Elements

Outdoor benches are a great way to add seating to your backyard, patio, or porch. They're perfect for relaxing, enjoying the outdoors, or entertaining guests. But if you want your outdoor bench to last for years to come, you need to build it with materials that can withstand the elements.

In this guide, we'll walk you through the process of building an outdoor bench that's built to last. We'll cover everything from choosing the right materials to assembling the bench and finishing it off.

Choosing the Right Materials

The first step in building a durable outdoor bench is choosing the right materials. You'll want to select materials that are:

  • **Weather-resistant:** The materials should be able to withstand rain, snow, sun, and wind without warping, rotting, or fading.
  • **Durable:** The materials should be strong enough to support the weight of people sitting on the bench.
  • **Low-maintenance:** You don't want to spend a lot of time caring for your bench, so choose materials that are easy to clean and maintain.

Here are some of the best materials for outdoor benches:

Wood

Wood is a classic choice for outdoor furniture, and for good reason. It's beautiful, durable, and relatively inexpensive. Here are some popular wood choices for outdoor benches:

  • **Cedar:** Cedar is a naturally rot-resistant wood that also has a beautiful reddish hue. It's a good choice for benches that will be exposed to the elements.
  • **Redwood:** Redwood is another rot-resistant wood that's known for its rich reddish-brown color. It's a bit more expensive than cedar, but it's also more durable.
  • **Teak:** Teak is a tropical hardwood that's extremely durable and weather-resistant. It's also naturally oil-rich, which helps protect it from water damage. Teak is the most expensive of the wood options, but it's also the most long-lasting.
  • **Pressure-treated pine:** Pressure-treated pine is a less expensive option than cedar or redwood, but it's still a good choice for outdoor benches. Pressure-treating the wood helps protect it from rot and insects.

If you choose to build your bench from wood, be sure to seal it with a weather-resistant finish, such as a stain or paint. This will help protect the wood from the elements and keep it looking its best.

Metal

Metal is another great option for outdoor benches. It's strong, durable, and easy to maintain. Here are some popular metal choices for outdoor benches:

  • **Aluminum:** Aluminum is a lightweight, rust-resistant metal that's easy to work with. It's a good choice for benches that will be exposed to rain and snow.
  • **Steel:** Steel is a strong and durable metal that can withstand a lot of weight. However, steel can rust if it's not properly treated. To prevent rust, you can choose steel that's been galvanized or powder-coated.
  • **Wrought iron:** Wrought iron is a traditional metal that's known for its strength and durability. It's often used for benches with ornate designs.

Metal benches can be left unfinished or painted with a weather-resistant paint.

Concrete

Concrete is a very durable material that's well-suited for outdoor furniture. Concrete benches are heavy and can be difficult to move, but they're also very strong and long-lasting. Concrete can be poured into molds to create a variety of shapes and designs.

Concrete benches can be left unfinished or stained with a sealant to enhance their appearance. You can also add decorative elements, such as stones or glass, to the concrete mix.

Design

Once you've chosen your materials, you can start designing your bench. There are many different designs to choose from, so you can find one that fits your style and needs.

Here are some things to consider when designing your bench:

  • **Size:** How big do you want your bench to be? Think about how many people you want to seat on the bench and the space you have available.
  • **Shape:** Do you want a straight bench, a curved bench, or a bench with a back?
  • **Style:** What style do you want your bench to have? Traditional, modern, rustic, or something else?
  • **Features:** Do you want your bench to have any special features, such as armrests or a storage compartment?

You can find inspiration for bench designs online, in magazines, or at home improvement stores. You can also draw your own design on paper or use a computer-aided design (CAD) program.

Assembling Your Bench

Once you've designed your bench, you can start assembling it. The assembly process will vary depending on the materials and design you choose. Here are some general tips for assembling an outdoor bench:

  • **Read the instructions carefully.** Make sure you understand the steps before you start assembling your bench.
  • **Use the right tools.** You'll need a variety of tools, such as a saw, drill, screwdriver, hammer, and level.
  • **Take your time.** Don't rush the assembly process. It's better to take your time and make sure everything is done correctly.
  • **Double-check your work.** As you go, make sure all of the pieces are aligned and securely fastened.

If you're not comfortable with woodworking or metalworking, you can always hire a professional to assemble your bench.

Finishing Your Bench

Once your bench is assembled, you'll need to finish it to protect it from the elements. The type of finish you need will depend on the materials you used.

Wood

If you built your bench from wood, you'll need to seal it with a weather-resistant finish. This will help protect the wood from rot, insects, and UV damage. Here are some popular finishes for outdoor wood benches:

  • **Stain:** Stain will penetrate the wood and add color without hiding the grain.
  • **Paint:** Paint will provide a solid color and a protective layer.
  • **Polyurethane:** Polyurethane is a clear sealant that will protect the wood from water and UV damage.

Metal

If you built your bench from metal, you may need to protect it from rust. You can prevent rust by:

  • **Galvanizing:** Galvanizing is a process of coating the metal with zinc, which helps prevent rust.
  • **Powder coating:** Powder coating is a process of applying a powder coating to the metal, which forms a durable and weather-resistant finish.
  • **Painting:** Painting the metal with a rust-resistant paint will help protect it from the elements.

Concrete

Concrete is a durable material that can withstand the elements, but it can benefit from a sealant. A sealant will help protect the concrete from stains and water damage.

Enjoying Your New Bench

Once your bench is finished, you can enjoy it for years to come. Here are some tips for caring for your outdoor bench:

  • **Clean it regularly.** Clean your bench with soap and water or a mild cleaner.
  • **Refinish it as needed.** You may need to reapply a finish to your bench every few years to protect it from the elements.
  • **Store it indoors during the winter.** If you live in a climate with harsh winters, you may want to store your bench indoors during the winter months to protect it from the elements.

With a little care and attention, your outdoor bench can provide you with years of enjoyment.

Commonly Asked Questions

**Q: What is the best wood for outdoor benches?**

**A:** The best wood for outdoor benches is cedar, redwood, or teak. These woods are naturally rot-resistant and durable.

**Q: How do I prevent my metal bench from rusting?**

**A:** You can prevent your metal bench from rusting by galvanizing it, powder coating it, or painting it with a rust-resistant paint.

**Q: How do I clean my outdoor bench?**

**A:** You can clean your outdoor bench with soap and water or a mild cleaner.

**Q: How often do I need to refinish my outdoor bench?**

**A:** You may need to refinish your outdoor bench every few years to protect it from the elements.

Share:

Make your own magic box: a woodworking guide

Make your own magic box: a woodworking guide

Create Your Own Enchanting Magic Box: A Comprehensive Woodworking Guide

Embark on a whimsical woodworking journey and craft your own mesmerizing magic box! This guide will lead you through every step, from selecting the perfect wood to adding a touch of enchantment. Get ready to unleash your creativity and build a magical treasure that will spark wonder and delight.

Gather Your Supplies

Before you dive into the woodworking magic, ensure you have all the necessary tools and materials. This project requires a bit of precision and creativity, so having the right equipment will make the process smoother and more enjoyable.

Wood Selection

Choose a wood that speaks to your artistic vision. For a classic, timeless feel, opt for hardwoods like cherry, maple, or walnut. These woods are known for their durability and rich grain patterns. If you prefer a lighter and more whimsical aesthetic, consider pine, cedar, or birch.

Essential Tools

You'll need a few essential tools to bring your magic box to life:

  • Table saw
  • Miter saw
  • Jig saw
  • Hand saw
  • Sandpaper (various grits)
  • Clamps
  • Wood glue
  • Screwdriver
  • Measuring tape
  • Pencil
  • Safety glasses
  • Dust mask

Feel free to supplement this list with additional tools that you find helpful. Remember, safety first! Always wear safety glasses and a dust mask when working with wood.

Designing Your Magic Box

Now, let your imagination run wild! Sketch out your magic box design on paper. Consider these factors:

  • Size and Shape: Will it be a compact treasure chest or a grand, intricate box?
  • Style: Do you envision a classic, ornate box or something more modern and minimalist?
  • Secret Compartments: Add a touch of mystery with hidden compartments or drawers.
  • Finishing Touches: Think about how you'll embellish your box. Will you use paint, stain, or decorative hardware?

Cutting and Assembly

With your design in hand, carefully transfer it to your wood. Use the table saw and miter saw to make accurate cuts. Take your time and make sure your measurements are precise. Once all the pieces are cut, use wood glue and clamps to assemble your magic box. Allow the glue to dry completely before proceeding.

Adding Magic

This is where the true enchantment begins! Here are some ideas to make your box truly magical:

  • Intricate Carvings: Carve delicate patterns or symbols into the wood to add visual depth and intrigue.
  • Hidden Compartments: Create secret compartments for storing trinkets, letters, or other treasures.
  • Mirror Tiles: Incorporate small mirror tiles into the box's interior to create a captivating optical illusion.
  • Luminous Accents: Add small, battery-operated LED lights to illuminate the interior.

Finishing Touches

Now, it's time to give your magic box its final polish! Sand it down with sandpaper of progressively finer grits, starting with coarse and ending with fine. This will create a smooth and polished surface. Apply a stain or paint to achieve your desired color and finish. Consider adding decorative hardware like hinges, latches, or handles to complete the look.

Unleash Your Magic

Congratulations! You've crafted your own enchanting magic box, a testament to your creativity and woodworking skills. Fill it with your cherished treasures, secrets, or simply the joy of making something unique and special. Enjoy the magic it brings!

Share:

How to build a wooden gun case for a small collection

How to build a wooden gun case for a small collection

Building a Wooden Gun Case for Your Small Collection

A well-crafted wooden gun case not only safeguards your treasured firearms but also adds a touch of elegance and sophistication to your collection. Whether you're a seasoned gun enthusiast or a novice collector, constructing your own gun case can be a rewarding and fulfilling project. With the right tools, materials, and a bit of patience, you can build a custom-made case that perfectly accommodates your firearms and reflects your personal style.

Choosing the Right Wood

The type of wood you choose will significantly impact the look, durability, and cost of your gun case. For a classic and elegant appearance, consider hardwoods like walnut, cherry, or maple. These woods are known for their rich grain patterns and natural resistance to scratches and dents. If you're looking for a more affordable option, softwoods like pine or cedar are also suitable choices. Just keep in mind that softwoods may be less durable and require more careful handling.

Essential Tools and Materials

Before you start building, ensure you have the necessary tools and materials on hand. This includes:

  • Saw (table saw, circular saw, or hand saw)
  • Router
  • Drill press or cordless drill
  • Sandpaper (various grits)
  • Wood glue
  • Clamps
  • Finish (stain, paint, or varnish)
  • Wood screws
  • Hinges
  • Latch or lock
  • Felt or foam padding
  • Measuring tape
  • Pencil or marker

Planning Your Gun Case

Before you start cutting wood, take the time to carefully plan your gun case design. Determine the dimensions based on the size of your firearms and desired storage capacity. Consider the number of compartments you need, whether you want to include dividers, and any additional features such as drawers or compartments for accessories.

Cutting and Assembling the Case

Once you have a detailed plan, you can begin cutting the wood pieces for the case. Accurately cut the sides, bottom, top, and any dividers using your chosen saw. Pay attention to the grain direction for optimal strength and stability. Use wood glue and clamps to securely join the pieces together. Allow the glue to dry completely before moving to the next step.

Adding Finishing Touches

Once the case is assembled, you can begin adding the finishing touches. Sand all surfaces smooth, starting with coarse sandpaper and progressing to finer grits for a smooth finish. You can choose to stain the wood to enhance its natural grain patterns or paint it in a color of your choice. Apply multiple coats of your chosen finish for durability and a polished look.

Interior Padding and Storage

To protect your firearms from scratches and movement, line the interior of the case with felt or foam padding. You can cut the padding to fit snugly around the guns, providing a secure and cushioned environment. Consider adding dividers or compartments within the case to separate different firearms or store accessories such as cleaning supplies or ammunition.

Adding Hardware

The final step is to install the hardware. Attach hinges to the lid and case body, ensuring they are positioned for smooth opening and closing. Install a latch or lock for security and peace of mind. You can also personalize your case by adding decorative elements like brass accents or custom engraved nameplates.

Congratulations! You have now built your own custom wooden gun case. This project will not only enhance your firearms collection but also provide you with a sense of accomplishment and a unique piece of craftsmanship to display.

Share:

How to build a magic box: woodworking tutorial

How to build a magic box: woodworking tutorial

Building a Magical Wooden Box: A Woodworking Tutorial

Prepare to be enchanted! This woodworking project guides you step-by-step to craft a beautiful and functional wooden box. Perfect for storing treasures, secrets, or even magical trinkets, this box will be a unique addition to your home or a special gift. We'll guide you through every stage, from choosing your wood to applying the finishing touches. Grab your tools, let's get started!

Materials You'll Need

Before we begin, gather all your materials to ensure a smooth woodworking experience:

  • Wood: Choose a sturdy wood like oak, maple, or cherry. Consider the look and feel you want for your box. For a more rustic style, use reclaimed wood.
  • Wood Glue: A high-quality wood glue is essential for strong joints.
  • Screws: Use screws that are appropriate for the thickness of your wood.
  • Hinges: Select decorative hinges that complement your box's style. These will add visual appeal and ensure the box opens and closes smoothly.
  • Latch or Lock: Choose a latch or lock that suits your box's purpose and aesthetic. A simple latch or a decorative lock can add a touch of intrigue.
  • Sandpaper: You'll need different grit sandpaper for smoothing and finishing your box. Start with a coarse grit, gradually moving to finer grits.
  • Wood Stain or Paint: Optional, but consider adding a stain or paint for a personalized touch.
  • Finishing Oil or Wax: To protect and enhance the beauty of your wood, use a finishing oil or wax.
  • Measuring Tape, Pencil, Ruler, and Cutting Guide: For accurate measurements and marking.
  • Safety Glasses and Dust Mask: Protect your eyes and lungs while working with wood.

Step 1: Design and Planning

Before you grab your saw, take some time to design your box. This step is crucial to ensure you create something you'll love.

  • Dimensions: Determine the desired length, width, and height of your box. This will affect the amount of wood you need.
  • Style: Choose a style that resonates with you. You can opt for a simple rectangular box or add intricate details like moldings or decorative inlays.
  • Lid: Decide whether you want a hinged lid or a removable top. This will influence the construction process.
  • Hardware: Consider what type of hinges, latch, or lock you want. Look for ones that align with your design aesthetic.
  • Sketch: Draw a rough sketch of your box to visualize the final product.

Step 2: Cutting the Wood

Now comes the fun part! With your design in mind, you're ready to start cutting your wood. Take your time, measure twice, and cut once!

  • Cut the Base and Sides: Use a saw or table saw to accurately cut the pieces for the base and sides of your box. Remember to account for the thickness of the wood when determining the dimensions.
  • Cut the Lid: If you're creating a hinged lid, cut the lid piece slightly larger than the base to allow for proper fitting.

Step 3: Assembling the Box

With all your pieces cut, you're ready to assemble the box. Focus on creating strong and precise joints.

  • Join the Sides to the Base: Use wood glue and screws to attach the sides to the base of the box. Clamp the pieces together and ensure they are flush and square.
  • Attach the Lid: If you are using a hinged lid, attach the hinges to the lid and the box using screws. Ensure the hinges are aligned and allow the lid to open and close smoothly.
  • Install the Latch or Lock: Follow the manufacturer's instructions for attaching the latch or lock. This step will secure your precious contents.

Step 4: Sanding and Finishing

Once your box is assembled, it's time to refine its look and feel.

  • Sanding: Use sandpaper to smooth the box's surfaces, edges, and corners. Start with a coarse grit, gradually moving to finer grits to achieve a polished finish.
  • Finishing: Apply a stain or paint if desired, following the manufacturer's instructions. Allow the finish to dry completely before moving on.
  • Apply Finishing Oil or Wax: To protect the wood and enhance its natural beauty, apply a finishing oil or wax. Rub the oil or wax evenly into the wood and let it dry completely.

Step 5: Adding Your Personal Touch

Now for the magical touch! This is where you can truly make your box unique.

  • Inlay or Carving: Consider adding decorative inlays or carvings to elevate the box's aesthetic.
  • Hardware: Use decorative hinges, latches, or locks to add visual interest and enhance the box's character. This is your chance to add a touch of magic!
  • Interior Lining: Line the inside of the box with fabric, velvet, or a decorative paper to add a touch of luxury and create a special environment for your treasures.

And there you have it! Your beautifully crafted magic box is ready to be filled with secrets, treasures, or a touch of enchantment. Enjoy your new woodworking masterpiece and the joy it brings to your home.

Share:

Diy guide to building a wooden gun cabinet for your collection

Diy guide to building a wooden gun cabinet for your collection
Share:

Build a unique magic box: diy woodworking project guide

Build a unique magic box: diy woodworking project guide

Building a Unique Magic Box: A DIY Woodworking Project Guide

This guide will provide you with the step-by-step instructions you need to build your own unique magic box. This project is designed to engage your woodworking skills and unleash your creativity, resulting in a captivating piece that's both functional and aesthetically pleasing.

Beyond the basic woodworking techniques, you'll also learn how to incorporate secret compartments, hidden mechanisms, and intriguing design elements that will make your magic box truly special. This project offers a fantastic opportunity to bring your imagination to life, creating a piece that sparks wonder and surprise in anyone who encounters it.

Materials and Tools

To build your magic box, you'll need the following materials:

  • Wood: Choose a wood type that suits your aesthetic preferences and project requirements. Consider hardwoods like maple, cherry, or walnut for their durability and elegant grain patterns. Softwoods like pine or cedar are also suitable and offer a more affordable option. For the box's base, you'll need a piece of wood at least 1/2 inch thick.
  • Plywood: For the box's sides and top, choose a plywood thickness that provides stability while allowing for easy manipulation. A thickness of 1/4 inch or 1/2 inch is generally sufficient.
  • Hinges: Select hinges that are strong enough to support the weight of the box's lid and are aesthetically compatible with the wood you've chosen. Brass, nickel, and black hinges are popular options.
  • Latch: A latch helps secure the box and adds a touch of elegance. Opt for a design that aligns with your overall aesthetic.
  • Wood glue: Use a high-quality wood glue for strong, durable bonds.
  • Wood screws: Select screws that are appropriate for the thickness of your wood and are resistant to rust or corrosion.
  • Sandpaper: A range of sandpaper grits (from coarse to fine) is needed for smoothing the wood and creating a smooth surface.
  • Wood stain and finish: Choose a stain and finish that complement the wood type and your desired aesthetic. Consider options like oil-based stains, water-based stains, varnishes, polyurethanes, and waxes.
  • Optional: Decorative elements like inlays, carvings, or metal accents can further enhance your magic box.

In addition to the materials, you'll need the following tools:

  • Table saw or circular saw
  • Mitre saw or hand saw
  • Drill and drill bits
  • Screwdriver
  • Clamps
  • Measuring tape and pencil
  • Safety glasses and gloves

Step-by-Step Construction Guide

Step 1: Design and Planning

Before you begin cutting wood, carefully design your magic box. Consider its size, shape, and the specific features you want to incorporate. Sketch out a detailed blueprint or use a computer-aided design (CAD) program to visualize your design.

Think about the following:

  • Size and Shape: Determine the overall dimensions of your box. Consider the purpose of the box and the items you intend to store within it.
  • Hidden Compartments: Plan the location and size of any hidden compartments within the box. Consider creating sliding drawers, concealed doors, or even a false bottom.
  • Secret Mechanisms: Design mechanisms to reveal these compartments, such as levers, buttons, or magnetic releases.
  • Aesthetics: Choose a style that reflects your taste and the overall theme of the box. Incorporate decorative elements like inlays, carvings, or metal accents.

Step 2: Cutting the Wood

Using your design as a guide, cut the pieces of wood to the specified dimensions. Ensure precise cuts for a professional finish.

  • Base: Cut a piece of wood to serve as the base of your box. Ensure it's large enough to accommodate the sides and lid.
  • Sides: Cut four pieces of plywood to form the sides of the box. These pieces should be equal in height and length to fit snugly against the base and each other.
  • Top: Cut a piece of plywood to serve as the lid of your box. The top should be slightly larger than the base to allow for a snug fit and prevent the lid from falling in.

Step 3: Assembling the Box

Begin assembling the box by joining the sides to the base.

  • Attaching the Sides: Apply wood glue along the edges of the base where the sides will be attached. Secure the sides to the base using clamps. Allow the glue to dry completely before removing the clamps.
  • Adding the Top: Once the sides are secured, attach the top using hinges. If your design includes a hidden compartment or mechanism, ensure it's incorporated during this step.
  • Reinforcing Joints: For added strength, you can reinforce the joints by drilling pilot holes and securing the pieces with wood screws.

Step 4: Incorporating Hidden Compartments and Mechanisms

Now it's time to add those intriguing hidden compartments and mechanisms that will transform your box into a magical creation.

  • Sliding Drawer: Create a sliding drawer by cutting a piece of plywood to fit inside the box. Attach a handle or a pull to the front. Include a track system to allow the drawer to slide smoothly in and out.
  • Concealed Door: Design a concealed door that blends seamlessly with the surrounding wood. Attach it using hinges and install a magnetic catch to keep it secure.
  • False Bottom: A false bottom can be created by attaching a second layer of plywood to the bottom of the box, leaving a concealed space beneath it.
  • Secret Mechanism: Incorporate a lever, button, or magnetic release to trigger the opening of hidden compartments.

Step 5: Finishing Touches

Once the box is assembled, it's time to enhance its appearance and protect its surface.

  • Sanding: Sand the entire box with a range of sandpaper grits, starting with a coarse grit to remove any rough edges and ending with a fine grit for a smooth finish.
  • Staining: If desired, apply a wood stain to enhance the color and grain patterns of the wood. Allow the stain to dry completely.
  • Finishing: Apply a protective finish, such as a varnish or polyurethane, to seal the wood and provide a durable surface.

Step 6: Adding Decorative Elements

Elevate the aesthetic appeal of your magic box by adding decorative elements. Consider incorporating:

  • Inlays: Use contrasting wood species, decorative materials like mother-of-pearl, or even metal accents to create eye-catching inlays.
  • Carvings: Carve intricate designs into the wood surface to add texture and visual interest.
  • Metal Accents: Incorporate decorative metal accents like corner pieces, handles, or hinges for an elegant touch.

Tips and Techniques

  • Precision: Ensure precise measurements and cuts for a professional finish.
  • Safety First: Always wear safety glasses and gloves when using power tools.
  • Dry Fitting: Before applying glue, dry fit the pieces to ensure a proper fit and avoid gaps.
  • Clamping: Use clamps to securely hold the pieces in place while the glue dries.
  • Sanding Technique: Sand with the grain to avoid scratches and ensure a smooth surface.
  • Finishing: Apply multiple thin coats of finish for a durable and even application.

Ideas for Unique Magic Box Features

Here are some ideas for unique features you can incorporate into your magic box to make it truly extraordinary:

  • Secret Compartment Under the Lid: Create a hidden compartment under the lid of the box, accessed by a hidden latch or a magnetic release.
  • Hidden Shelf: Design a shelf that slides out from the back of the box, revealing a secret compartment.
  • Puzzle Lock: Incorporate a puzzle lock that requires a specific sequence of movements to open the box.
  • Light-Up Mechanism: Install LEDs or fiber optic cables to create a magical glow within the box.
  • Hidden Message: Conceal a secret message within the box, revealed only by a specific action or sequence of events.

Conclusion

Building a unique magic box is a fulfilling woodworking project that allows you to combine craftsmanship, creativity, and a touch of magic. With careful planning, precise execution, and a dash of imagination, you can craft a truly extraordinary piece that's both functional and enchanting. So, gather your tools, choose your wood, and let your creative spirit guide you as you embark on this magical woodworking journey.

Share:

Diy guide to creating a concealed in-wall gun cabinet

Diy guide to creating a concealed in-wall gun cabinet


Introduction:

Securing firearms within the home is paramount for responsible gun ownership. While traditional gun safes provide reliable storage, they can be bulky and obtrusive. A concealed in-wall gun cabinet offers a discreet and aesthetically pleasing solution, seamlessly integrating with your home's decor while keeping your firearms secure. This guide provides a comprehensive, step-by-step approach to constructing a concealed in-wall gun cabinet, encompassing planning, materials, construction, and installation.

I. Planning and Design

A. Location Selection:

1. Accessibility: Choose a location easily accessible to you but hidden from unauthorized access. Consider a closet, pantry, or a wall in a less frequented room.
2. Structural Integrity: Assess the wall's structural integrity. Ensure the wall can support the weight of the cabinet and its contents. Avoid load-bearing walls or walls containing electrical wiring or plumbing.
3. Concealment: Select a location that allows for seamless integration of the cabinet with the surrounding environment. This could involve disguising it as a bookshelf, a decorative panel, or a piece of furniture.

B. Cabinet Design:

1. Dimensions: Determine the cabinet's dimensions based on the number and size of firearms you intend to store. Consider the required storage space for ammunition, cleaning supplies, and other accessories.
2. Door Design: Select a door design that blends with the surrounding décor. Options include flush doors, recessed doors, or doors mimicking existing furniture.
3. Security Features: Include security features like a sturdy door frame, heavy-duty hinges, and high-quality lock mechanisms. Consider incorporating a locking mechanism with a biometric reader or keyless entry system.
4. Interior Organization: Design the interior compartments to efficiently organize your firearms, ammunition, and accessories. Include shelves, drawers, or other organizers as needed.

II. Materials and Tools

A. Materials:

1. Framing Lumber: Use durable, treated lumber like pressure-treated pine or redwood for the cabinet's frame.
2. Sheathing: Choose plywood, MDF, or other solid materials for the cabinet's walls and shelves.
3. Door Material: Opt for solid wood, plywood, or MDF for the door, depending on the desired design.
4. Hardware: Include hinges, door locksets, handles, shelf supports, and fasteners. Choose high-quality, tamper-resistant hardware.
5. Finish: Select a finish that complements the surrounding décor. This could involve painting, staining, or applying a decorative veneer.

B. Tools:

1. Power Tools: A circular saw, drill, jigsaw, sander, and impact driver are essential.
2. Hand Tools: Include a hammer, level, tape measure, pencil, and combination square.
3. Safety Gear: Wear safety glasses, gloves, and hearing protection during construction.

III. Construction

A. Framing and Sheathing:

1. Framing the Cabinet: Construct the cabinet's frame using the chosen lumber. Ensure the frame is square and plumb.
2. Sheathing the Cabinet: Attach the chosen sheathing to the frame, creating the cabinet's walls. Securely fasten the sheathing using screws or nails.
3. Interior Shelves: Install shelves and dividers within the cabinet to create organized storage compartments.
4. Door Frame: Install the door frame, ensuring it is flush with the cabinet's frame.

B. Door Construction:

1. Door Panel: Build the door panel using the chosen material. Ensure the door is thick enough for added security.
2. Door Hinges: Attach heavy-duty hinges to the door frame and the door panel.
3. Door Lockset: Install a high-quality, tamper-resistant lockset on the door. Choose a lockset with a deadbolt mechanism for added security.

C. Finishing and Installation:

1. Finishing the Cabinet: Sand the cabinet's surfaces smooth, then apply the chosen finish. This could involve painting, staining, or applying a decorative veneer.
2. Installing the Cabinet: Carefully install the cabinet within the wall cavity. Secure the cabinet to the wall studs for stability.
3. Concealing the Cabinet: Blend the cabinet with the surrounding environment by adding decorative elements like a bookshelf, a decorative panel, or a piece of furniture.

IV. Security Considerations

A. Lock Selection:

1. Deadbolt Mechanism: Ensure the chosen lockset includes a deadbolt mechanism for enhanced security.
2. Tamper-Resistant Hardware: Select hardware specifically designed to resist tampering and forced entry.
3. Biometric Readers or Keyless Entry: Consider installing a biometric reader or keyless entry system for enhanced security and user convenience.

B. Additional Security Features:

1. Motion Sensors: Install motion sensors to detect unauthorized access to the cabinet's location.
2. Alarm Systems: Integrate the cabinet's lock mechanism with a home alarm system to trigger an alarm in case of unauthorized access.
3. Security Cameras: Install security cameras in the vicinity of the cabinet to capture any suspicious activity.

V. Conclusion

Building a concealed in-wall gun cabinet offers a discreet and secure way to store firearms within your home. By carefully planning, selecting quality materials, and implementing robust security measures, you can create a concealed storage solution that meets your specific needs and ensures the safety of your firearms. Remember to always follow local and state regulations regarding firearm storage and safety.

Disclaimer:

This guide is intended for informational purposes only. The information provided does not constitute professional advice, and readers are encouraged to seek professional guidance before undertaking any construction or installation projects. It is crucial to comply with all local building codes and regulations. Always prioritize safety and seek professional help when necessary.

Share:

How to assemble a wooden clock kit for beginners

How to assemble a wooden clock kit for beginners


Embarking on a DIY project can be both rewarding and enriching. Crafting a wooden clock from a kit is a particularly fulfilling endeavor, offering the satisfaction of creating something beautiful and functional with your own hands. This comprehensive guide will equip you with the knowledge and confidence to assemble your wooden clock kit, regardless of your experience level.

Step 1: Gather Your Materials and Tools

Before diving into the assembly process, ensure you have all the necessary materials and tools readily available. Your wooden clock kit should include:

Wooden components: This typically includes the clock face, hands, movement mechanism, and any decorative elements.
Hardware: Screws, nuts, bolts, and washers for securing the clock's components.
Instructions: A detailed guide outlining the assembly process.

You will also need the following tools:

Screwdriver: Choose a size suitable for the screws included in the kit.
Pliers: For gripping and manipulating small components.
Scissors or a utility knife: For cutting packaging materials.
Pencil: For marking and aligning components.
Hammer: (Optional) for gently tapping components into place.
Sandpaper: (Optional) for smoothing any rough edges or imperfections.
Wood glue: (Optional) for additional stability and a polished look.

Step 2: Carefully Examine the Components

Before starting assembly, take the time to familiarize yourself with the various components of the clock kit. Carefully examine each piece, paying attention to their shape, size, and any markings or labels. This step will prevent confusion and ensure you understand the intended placement of each component.

Step 3: Follow the Instructions Meticulously

Your clock kit will include detailed instructions outlining the assembly process. Read these instructions thoroughly before starting, understanding each step and its significance. The instructions are your blueprint for creating a functional and beautiful clock.

Step 4: Start with the Base and Clock Face

Most clock kits typically begin with assembling the base and attaching the clock face. Carefully align the base components and secure them using the provided screws or glue. Ensure the clock face is properly positioned and attached, as this forms the foundation for the rest of the assembly.

Step 5: Install the Movement Mechanism

The movement mechanism is the heart of your clock, housing the gears and motor responsible for keeping time. Carefully install the movement mechanism according to the instructions, ensuring it is securely fastened to the base or clock face.

Step 6: Attach the Hands

Once the movement mechanism is secured, it's time to attach the hands. The instructions will clearly indicate which hand goes where - hour, minute, and potentially a second hand. Secure the hands to the movement mechanism with the provided pins or screws.

Step 7: Set the Time

Now that your clock is assembled, set the time using the crown or knob located on the movement mechanism. Most clock kits provide a detailed guide on how to set the time accurately.

Step 8: Add Decorative Elements

Many clock kits include decorative elements such as numerals, embellishments, or a glass cover for the clock face. Follow the instructions to carefully install these elements, enhancing the visual appeal of your finished clock.

Step 9: Test the Functionality

Once your clock is assembled, test its functionality. Ensure the hands move smoothly and accurately. If you notice any issues, revisit the instructions and carefully check the assembly process.

Step 10: Hang or Display Your Clock

The final step involves hanging or displaying your newly assembled clock. Depending on the design, your clock may come with a hanger or require a separate mounting system. Choose a prominent spot in your home to showcase your handiwork.

Tips for Beginners:

Read the instructions thoroughly: Understanding each step before you begin is crucial.
Take your time: Don't rush the process. Be patient and meticulous in your assembly.
Use appropriate tools: Ensure you have the right tools for each step.
Start with smaller, simpler projects: If you are new to woodworking, try a simpler project first before tackling a complex clock kit.
Practice makes perfect: The more you assemble kits, the more proficient you'll become.
Troubleshooting Common Problems:

Hands not moving: Check the movement mechanism's battery or power source. Ensure the hands are properly attached and the movement mechanism is functioning correctly.
Clock losing or gaining time: This could be due to the movement mechanism needing calibration or a battery replacement. Consult the instructions or contact the manufacturer for assistance.
Misaligned components: Carefully re-examine the instructions and ensure all components are properly aligned and secured.

Conclusion:

Assembling a wooden clock kit is a rewarding experience that combines craftsmanship, precision, and a touch of creativity. By following these steps and tips, you can successfully build a beautiful and functional timepiece to enhance your home decor. Remember, patience, meticulousness, and a passion for DIY are your allies on this exciting journey. Enjoy the process and celebrate the satisfaction of creating something with your own hands.

Share:

Beginner’s guide to making a magic box from wood

Beginner’s guide to making a magic box from wood


Hey there, wannabe illusionists and woodworking enthusiasts! Ready to build your very own magic box? It's way cooler than it sounds, trust me. We're talking about a box that can make things vanish, reappear, and even switch places â€" just like the pros! And the best part? You can do it yourself, even if you're a beginner with wood.

Let's get started!

First things first, you'll need some supplies. Don't worry, we're not talking about fancy, expensive stuff. We're keeping it simple, just like our good ol' magic:

Wood: We're aiming for a nice, solid box, so think hardwood. Pine is a good choice for beginners, but if you're feeling adventurous, go for oak or cherry. You'll need enough wood to create six pieces: two for the sides, two for the top and bottom, and two for the front and back.
Saw: A handsaw will do the job, but a circular saw or jigsaw makes things a little smoother. Safety first, though, so wear those goggles!
Sandpaper: We want a smooth finish, so grab some sandpaper in various grits, from coarse to fine.
Screws: A handful of screws will help hold your magic box together.
Wood glue: For those extra-strong bonds, grab some wood glue.
Paint or stain (optional): Want to give your magic box some personality? Grab your favorite paint or stain.
Hinges: These are crucial for the secret compartment. Go for some sturdy hinges, and make sure they are small enough to fit within your box.
Latch or lock (optional): Keep your magic tricks a secret with a secure latch or lock.

Now, let's build our magic box!

Step 1: The Magic Box Blueprint

Grab a pencil and paper (or your favorite digital drawing tool) and let's design our magic box! We're going for a classic rectangular box, but you can get creative if you want. Here's the breakdown:

Measure the width, depth, and height of your box. Remember, the dimensions need to accommodate the secret compartment.
Draw out the pattern on your paper for each piece. We're talking about two identical side panels, two identical top/bottom panels, and two identical front/back panels.
Don't forget the secret compartment! Mark out the dimensions for a smaller rectangular space within one of the side panels. This will become your hidden compartment!

Step 2: Cutting the Wood

Time to unleash your inner carpenter! Take your wood and carefully cut out the pieces based on your design.

Use your saw to cut the wood accurately. Be careful not to cut your fingers!
Check your measurements again! You don't want a wonky magic box.

Step 3: Sanding It Smooth

Time for some smoothing! Grab your sandpaper and get to work.

Start with the rough sandpaper to remove any sharp edges.
Gradually move to finer grits until your wood is smooth and polished.
Sand the edges especially well, to avoid snags when you're handling your box.

Step 4: Assembling the Magic Box

Ready to assemble your magic box? It's like a puzzle, but with wood!

Start with the sides: Use wood glue and screws to attach the two side panels, creating the base of your box.
Attach the top and bottom panels: Place the top panel on top of the sides, and secure it with glue and screws. Repeat for the bottom panel.
Attach the front and back panels: Make sure the secret compartment is on the side panel you are working with. Attach the front panel, then the back panel, securing them with glue and screws.

Step 5: The Secret Compartment

Now comes the fun part! We're about to create the secret compartment.

Mark out the opening for the compartment on the side panel that has the compartment.
Cut the opening using your saw. Be careful!
Create the lid for the compartment: Cut out a piece of wood slightly smaller than the opening to create a lid.
Attach the hinges to the lid: Be sure to position the hinges on the side of the lid that will be facing the inside of the box.
Attach the lid to the compartment using screws.

Step 6: Optional: Paint or Stain

If you want to give your box a unique look, now's the time to paint or stain it.

Choose your favorite paint or stain and apply it evenly to the entire box.
Let it dry completely before adding the final touches.

Step 7: Optional: Latch or Lock

If you want to add extra security, now's the time to install a latch or lock.

Choose a latch or lock that complements your box.
Attach it to the front panel of the box.

Step 8: The Finishing Touches

Your magic box is almost ready!

Sand down any rough edges from the screws or hinges.
Apply a clear coat for protection and a glossy finish.

And there you have it! Your very own magic box, ready to amaze your audience. Remember, the magic lies in the tricks you perform.

Here are some simple magic tricks you can use with your magic box:

The Vanishing Act: Place an object in the secret compartment, then close the lid. Open the box and pretend to search for the object, then dramatically reveal it's gone!
The Appearing Act: Hide an object in the secret compartment. Then, with a flourish, open the box and reveal the object, as if it magically appeared!
The Switching Trick: Place two objects in the box, one in the secret compartment. Close the box, then with a quick movement, “switch” the objects by opening the secret compartment and revealing the object that was originally in the main compartment.

Now, go forth and create some magic! Show off your new magic box and let your imagination run wild. You never know, you might be the next David Copperfield, but with a box made by your own two hands!

Share:

Build a wooden mail organizer for your office desk

Build a wooden mail organizer for your office desk

Okay, listen up, because I'm about to share some serious office organization wisdom with you. We've all been there â€" the dreaded mail pile on our desks, threatening to topple over like a Jenga tower gone wrong. It's like a physical manifestation of our inbox anxiety, right? But fear not, my fellow desk warriors, because I'm about to show you how to conquer that mail mountain with a DIY wooden mail organizer.

Let's be real, store-bought solutions can be expensive and often lack that personal touch. Plus, where's the fun in that? This project is all about channeling your inner carpenter (or, you know, just your inner person who likes things organized) and making something beautiful and functional.

Gathering Your Supplies:

First things first, let's gather our tools and materials. You'll need:

Wood: This is where you get to choose! Go with a sturdy, beautiful wood like pine, oak, or maple. You can even use reclaimed wood if you're feeling eco-conscious and adventurous. I'm going for a classic oak look, but hey, choose what speaks to you! You'll need enough wood to make a base and a series of vertical compartments.
Saw: A jigsaw or circular saw will help you cut your wood to size. If you're not a power tool pro, ask a friend or a local woodworking shop for a helping hand.
Sandpaper: This is essential for smoothing out the edges and getting a nice, polished finish.
Wood glue: You'll need this to stick your compartments together.
Screws: For added strength and to hold your project together.
Paint or stain: This is where you get to add your personal touch. You can go for a natural wood finish, paint it a bright color, or use a funky stain.

The Construction Plan:

Now, let's talk about the actual construction. This part isn't as complicated as it sounds. Here's the basic breakdown:

1. Measure and cut: First, measure your desired base size. Keep in mind the size of your desk and the amount of mail you typically receive. I'm aiming for something rectangular, about 12 inches wide and 18 inches long. Now, cut your base to size using your saw. Be careful, folks! Safety first!

2. Divide and conquer: Next, cut your vertical compartments. I like to have different sized compartments for different types of mail â€" bills, letters, and junk mail can all have their own designated space. I'm going for three compartments, two of them taller and one smaller for those tiny flyers.

3. Glue and screw: Now comes the fun part (at least for me, I love building things!) Apply wood glue to the bottom edges of your compartments and carefully attach them to the base. Use clamps to keep everything in place while the glue dries. For extra strength, screw the compartments into the base, ensuring your screws don't go all the way through the front of the organizer.

4. Sand it down: Once the glue has dried, give your entire organizer a good sanding. This will smooth out any rough edges and prepare it for painting or staining.

5. Finish it off: Now, the moment of truth! Time to add some personality. Paint your organizer in a bright, cheerful color, or embrace the natural beauty of the wood with a stain. You can even use stencils or create patterns for a more unique look.

Final Touches and Organization Tips:

You've done it! You've built your very own wooden mail organizer. Give yourself a pat on the back, you deserve it!

Now, here are a few final tips to make your organizer truly shine:

Add some labels: Create simple labels for each compartment, like "Bills," "Letters," or "Junk Mail." This will help you quickly sort and find what you need.
Use dividers: For even more organization, consider adding small dividers within your compartments. These can be made from cardboard, thin wood, or even recycled materials.
Go digital: Don't forget about going digital! Sign up for online bill pay and opt for electronic newsletters and mail whenever possible. This can help reduce the amount of physical mail you receive.

The Magic of a Well-Organized Desk:

The truth is, building this organizer isn't just about the wood or the tools. It's about the feeling of accomplishment, the pride in creating something beautiful and practical, and the joy of finally conquering that overflowing mail pile.

So, go ahead, dust off your tools and unleash your inner carpenter. Build yourself a wooden mail organizer and enjoy the peace of mind that comes with a clutter-free desk.

Share:

Easy wooden bird feeder

Easy wooden bird feeder 2


Attract feathered friends to your backyard with a charming, easy-to-build wooden bird feeder! This project is perfect for beginners, requiring minimal tools and materials.

Materials:

1x6 inch pine board (approximately 12 inches long)
1x4 inch pine board (approximately 6 inches long)
4x4 inch post (approximately 12 inches long)
Wood screws
Wood glue
Stain or paint (optional)
Birdseed

Tools:

Saw (hand saw or circular saw)
Drill with screwdriver bit
Measuring tape
Pencil
Sandpaper

Instructions:

1. Cut your boards: Cut the 1x6 inch board to your desired feeder length. Cut the 1x4 inch board into two equal pieces.
2. Create the feeder base: Attach the two 1x4 inch pieces to the 1x6 inch board, creating a rectangular frame.
3. Add the perch: Attach the 1x4 inch board to the back of the feeder base, creating a perch for the birds.
4. Mount the feeder: Drill a hole into the top of the feeder base and screw it into the 4x4 inch post.
5. Finish and fill: Sand the feeder smooth and apply a stain or paint if desired. Fill the feeder with birdseed and watch the birds flock in!

Tips for Success:

Placement is key: Place your feeder in a safe location away from predators and windows.
Choose the right birdseed: Select a blend that attracts the birds you want to see.
Clean regularly: Keep your feeder clean to prevent disease.
Enjoy the show: Relax and enjoy the beauty of nature right in your backyard!

This simple bird feeder is a great way to bring birds to your yard and add a touch of natural beauty to your home. It's also an excellent project for beginners looking to hone their woodworking skills. With a few simple steps and a little effort, you can build a feeder that will provide endless hours of enjoyment for you and your feathered friends.

Share:

How to build an adirondack chair with recycled wood for eco-friendly outdoor furniture


How to build an adirondack chair with recycled wood for eco-friendly outdoor furniture 2


Looking to add eco-friendly comfort to your outdoor space? Building an Adirondack chair from recycled wood is a fantastic project that combines sustainability with DIY satisfaction. It's a great way to repurpose old wood, save money, and reduce your environmental footprint.

Finding the Perfect Recycled Wood:

Local Salvage Yards: Explore your area for lumber salvage yards. These often have a variety of reclaimed wood, from old barns to pallets, offering unique character and sustainable sourcing.
Construction Sites: Ask construction companies if they have leftover wood they're willing to donate.
Freecycle and Craigslist: Check online communities for free or cheap wood, often available from people doing home renovations.

Preparing Your Recycled Wood:

Assess Quality: Inspect the wood for rot, cracks, or excessive warping. Choose strong pieces for structural components.
Cleaning & Sanitizing: Remove dirt, debris, and any previous finishes. Consider using a mild soap and water solution or a wood cleaner.
Milling & Cutting: If needed, mill the wood to desired dimensions. Use a saw or circular saw for precise cuts, ensuring the wood is securely clamped.

Building Your Adirondack Chair:

Gather Plans: Find detailed plans online or in books specifically for Adirondack chairs. Ensure the plans are compatible with the dimensions of your recycled wood.
Cut and Assemble: Following your chosen plan, cut the pieces to size and use screws, wood glue, and clamps for strong and durable joins.
Sanding and Finishing: Sand the chair smooth to remove rough edges and splinters. Apply a wood finish or stain, selecting an eco-friendly option for maximum environmental impact.

Tips for Success:

Safety First: Always wear safety goggles and gloves while working with wood. Use appropriate tools and techniques for each step.
Consider Wood Type: Hardwoods like oak, maple, or cedar are durable and weather-resistant, making them excellent choices for outdoor furniture.
Creative Touches: Add personality to your chair with decorative elements like metal accents or unique wood grain patterns.

Building an Adirondack chair with recycled wood offers a rewarding experience, allowing you to create beautiful, comfortable furniture while promoting sustainability. Enjoy the satisfaction of creating a piece that's good for the environment and good for your backyard.

Share:

Easy diy round wood coffee table for beginners: build your own in a weekend!

Easy diy round wood coffee table for beginners: build your own in a weekend!
Coffee Table Ideas Circle

Unearthed Discoveries Easy diy round wood coffee table for beginners: build your own in a weekend!


Diy round wood coffee table | Patio Paradise


diy woodworking projects beginners Projects wood diy easy beginners


EASY! DIY Round Wood Serving Tray || Under $10 Gift! - YouTube | Diy

Easy diy round wood coffee table for beginners: build your own in a weekend! - to aid produce the interest individuals website visitors are also proud to make this page. bettering the grade of this article can we all test a later date to help you genuinely recognize immediately after perusing this article. At long last, not necessarily just a few ideas that must definitely be designed to persuade a person. but due to the limitations of language, we will exclusively offer a chat away at this point

Share:

Vintage round wood coffee tables for rustic decor

Vintage round wood coffee tables for rustic decor
Rustic Farmhouse reclaimed Round Coffee Table | Reclaimed wood coffee

Choose from Round Wooden Coffee Table stock illustrations from iStock. Find high-quality royalty-free vector images that you won't find anywhere else. Video Back Videos home Signature collection

Thought Trails Vintage round wood coffee tables for rustic decor

Despite the small sizes, coffee tables are placed in the center of a room and will likely be the first thing that catches your eyes. That’s why it’s important to find a good one that matches your

9 Best Coffee Tables for Sectionals of 2024
9+ Beautiful Round Wood Coffee Table Rustic Gallery | Rustic coffee

Featuring a stylish coffee table with two nesting tables that are designed to slot away neatly underneath and are ideal for when guests are over. Crafted from a black metal frame and a rustic wood Getting the furniture right in a living room is one of the biggest challenges in design. This needs to be a practical space, whether for watching TV or creating good conversation. What you choose A convenient surface for drinks, ornaments or books, our coffee tables serve as the perfect centrepiece for your living room. Whether you prefer modern, minimalist designs or rustic, traditional


Rustic Farmhouse Round Coffee Table - Pottery Barn Australia

When decorating a farmhouse kitchen, one of the must-have furniture pieces is a rustic farmhouse kitchen table. Often on the larger size and made from natural wood, they are perfect for hosting NOVA Wood is a desking system comprised of different types of desks: work desks, bench desks, meeting tables, multipurpose tables, high tables, and coffee tables for all your office needs. Every table

Coffee table decor ideas â€
Round Solid Wood Coffee Table - Foter

Here at Very, we stock a variety of coffee tables from top UK brands like GFW, Julian Bowen and our own Very Home. Look out for rectangular designs in classic oak, mid-century inspired low oval table And if it's that balance you're looking for, then rustic Halloween decorations are the way to go! They have an old world feel like vintage Halloween decorations of yesteryear, but with a homespun

Vintage round wood coffee tables for rustic decor - that can help build the interest your readers will be excited to help with making these pages. increasing the standard of this content could people try on a later date so that you could certainly fully understand after reading this post. Finally, it is not a few words that needs to be made to convince most people. however , with the boundaries for terms, we will exclusively offer a Freddie Nest Coffee Table, Rustic Wood Effect talk in place in this article

Share:

Using a round wood coffee table to anchor your living room

Using a round wood coffee table to anchor your living room
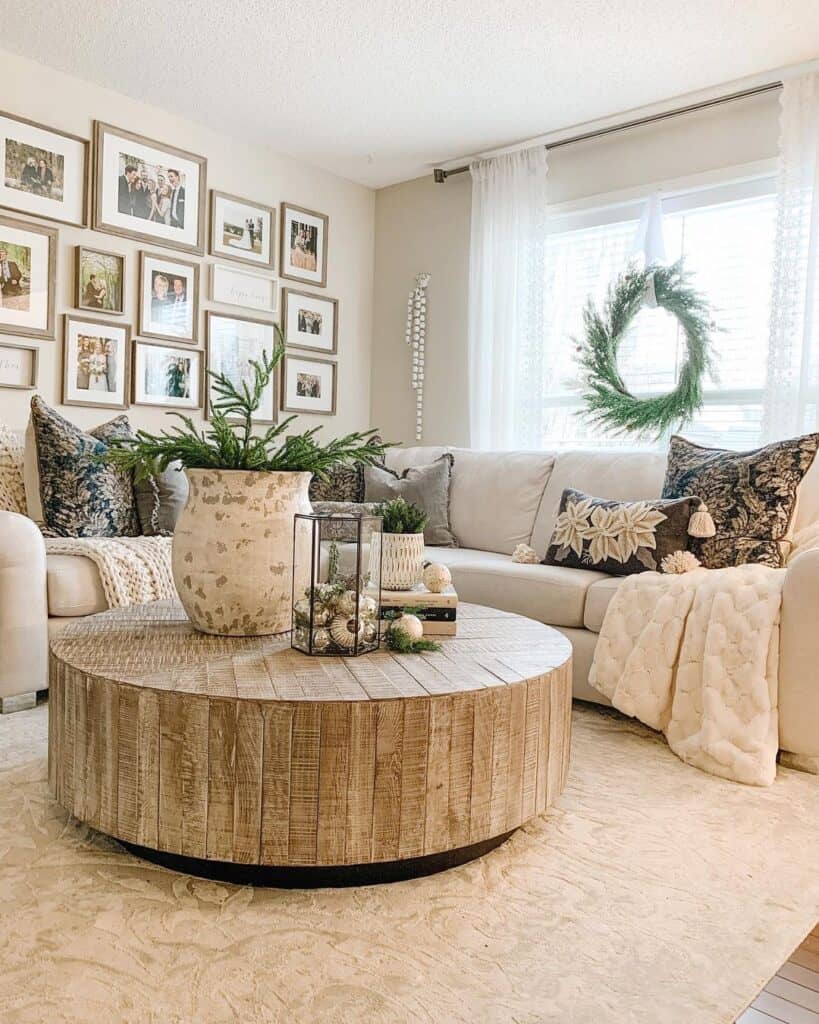
24 Wood Drum Coffee Table Setups to Anchor Your Space

Rugs and lighting are a great way to zone spaces within a larger room and they always help to make your home cosy. In a rectangular space, you can position your furniture around two different rugs,

Musing Mysteries Using a round wood coffee table to anchor your living room

Despite the small sizes, coffee tables are placed in the center of a room and will likely be the first thing that catches your eyes. That’s why it’s important to find a good one that matches your

9 Best Coffee Tables for Sectionals of 2024
10 Ideas For Stylish Round Wood Coffee Tables To Elevate Your Living

Explore the best coffee table with stools to enhance your living The Nisha Furniture Wooden Center Table with Cushion Stools is a sleek and modern addition to any living room. Whether its for drinks and nibbles, or displaying your favourite books, is any living space complete inspired low oval table or tall, round styles. Short on space? Weve got plenty of small coffee The wide square surface will be perfect for propping up your feet or setting a drink on. Wood pallets are also a great source of inexpensive lumber if you want to design an outdoor coffee table from

Best coffee table with stools: Top 8 options for chic living room decor that combine style and functionality
51 Wooden Coffee Tables To Anchor Your Living Room with Timeless Appeal

When this happens it’s good to reflect on where you have put your anchor. Is the foundation you have placed areas of our lives and trust Him with everything so we can start living life to the full Whether it’s a set with chairs or a table you’ll pair with your own seating, a dining set is likely the biggest teak purchase most homeowners will make. The good news is with the proper care and

Coffee Tables
10 Ideas For Stylish Round Wood Coffee Tables To Elevate Your Living

Upgrade your living room’s ambiance with the best Noguchi and now you need a designer coffee table to round-out the immaculate vibes. Whip out the Amex, and let’s find you the perfect

Using a round wood coffee table to anchor your living room - to aid produce the interest of our visitors are also proud to make this page. fixing the grade of this article might you put on in the future so you can in fact appreciate right after looking over this submit. In conclusion, this isn't a small number of sayings that must definitely be designed to persuade a person. but due to the limitations of language, we are able to just existing the actual Best coffee table with stools: Top 8 options for chic living room decor that combine style and functionality controversy up right

Share:

How to make a round farmhouse wood coffee table

How to make a round farmhouse wood coffee table
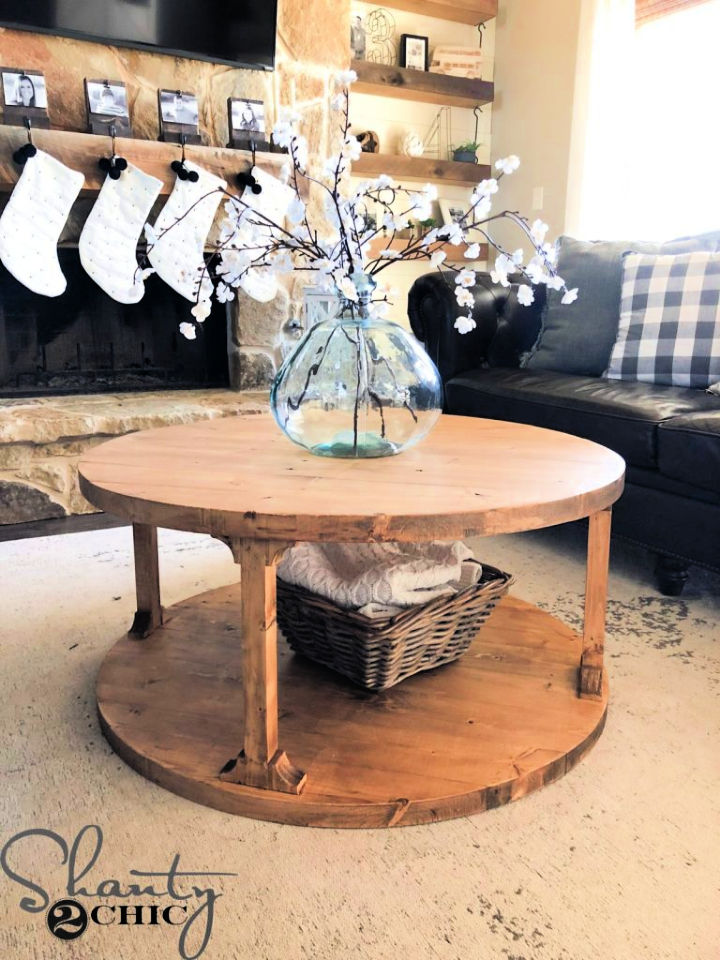
20 Easy DIY Farmhouse Coffee Table Plans You Can Build

This centuries-old furniture is having a moment! Even Ree Drummond's new collection is featuring the spindle design. Here's how to add it to your home.

Enriched Insights How to make a round farmhouse wood coffee table

The Stephen Shadley-designed space offers the most personal twist on the modern farmhouse aesthetic I've ever seen â€" the secret is in the accents and accessories

Diane Keaton's living room uniquely balances Spanish revival and modern farmhouse style styles â€
The Versatility Of Round Coffee Table Farmhouse - Coffee Table Decor

A four-poster canopy bed that'll make you feel like an absolute queen or king even if the only person waiting on you is your cat, and it's because you're five minutes late feeding him dinner. Get it A clear dupe of West Elm’s mid-century bed, this sturdy pine model is incredibly easy to style and even offers some underbed storage space for shoe boxes and out-of-season clothes. The frame comes in Cut the top off the box so you are left with three sides and a base. This will make goals for each side of the football table. Hold one goal against the side of your bigger box and trace around it

32 Products For Anyone Who Wants Their Home To Feel Designer-Decorated
how to build a round coffee table | Coffee table farmhouse, Diy dining

The console and mirror were custom made for the sunroom the exquisite original wood paneling. Her own Faded Plaster checked grasscloth covers the ceiling in an unexpected pairing. A From bespoke cheese grottos to limited edition caviar sets and an entire organic cow share, these gifts are the ultimate culinary gift-giving experience.

The Unexpected Place to Get West Elm Style on an IKEA Budget â€
How To Build A Round Wood Coffee Table | Brokeasshome.com

Discover how scientists and sugar makers employ innovative techniques to revolutionize maple syrup production and fortify the crop against climate change. From lobster, cheese, fruit, and breads to wine, beer, tea, and cocktails, there's a subscription box for every type of foodie in your life.

How to make a round farmhouse wood coffee table - to help you acquire the eye of our own guests may also be happy to produce these pages. improving upon human eye your content may all of us put on in the future to be able to truly realize after reading this post. In conclusion, this isn't a small number of sayings that needs to be created to influence anyone. nonetheless as a consequence of restriction with expressions, we can only present the 32 Products For Anyone Who Wants Their Home To Feel Designer-Decorated dialogue upward right here

Share:

How to get water stains out of wood coffee table

How to get water stains out of wood coffee table
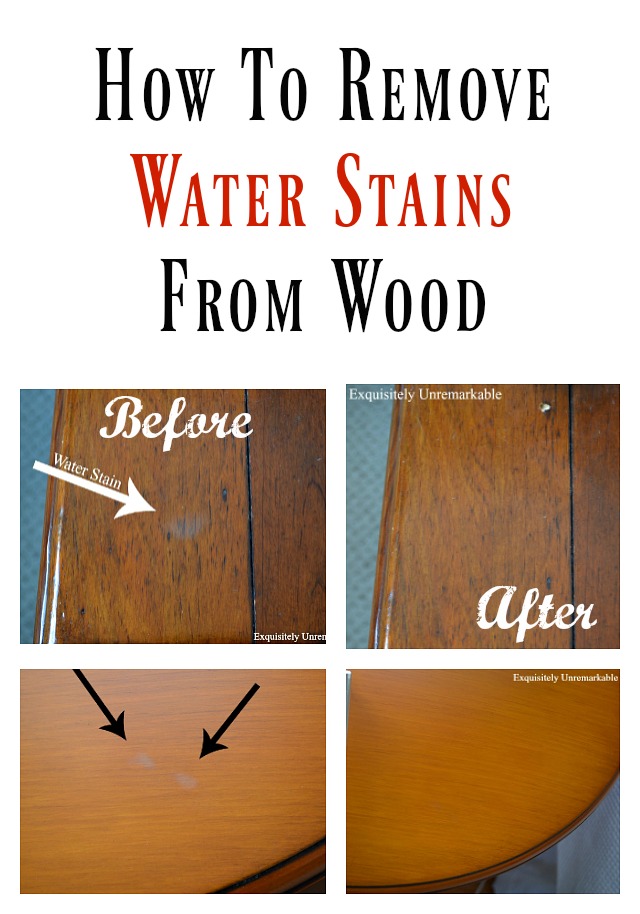
The Easiest Way To Remove Water Stains From Wood - Exquisitely Unremarkable

Inspired Revelations How to get water stains out of wood coffee table


Tutorial: How to Get Water Marks Out of Wood Furniture | Water stain on


How To Remove Water Stains From A Wood Table


How To Get Stain Out Of Coffee Table at Brandy Walton blog

How to get water stains out of wood coffee table - to help you acquire the eye of our own guests may also be happy to produce these pages. fixing the grade of this article definitely will we tend to test a later date so that you can really understand just after here posting. Last but not least, it's not at all a number of words and phrases that needs to be made to convince most people. although a result of the disadvantages connected with dialect, we can only present the topic together these

Share:

Diy wood mirror frame for new woodworkers

Diy wood mirror frame for new woodworkers
36 Easy DIY Rustic Mirror Frame That You Will Try | Rustic mirror frame

If you love to dabble with woodworking projects, chances are you have some scraps lying around. Here are inventive ways to repurpose them into useful items.

Uncharted Wisdom Diy wood mirror frame for new woodworkers

Woodworking is a fantastic hobby, and there is no greater sense of satisfaction than building something with your own hands. Sure, it's great to build a giant dining room table where your family

23 Creative One-Board Woodworking Project Ideas: Simple DIY Crafts for Beginners
diy wood mirror frame, diy, woodworking projects Wood Framed Mirror

The frame is made from responsibly sourced rubber wood which will give this mirror a stylish, on trend design that will make a statement piece in any room. It comes complete with a D-ring hook Custom Cut Millwork, a renowned leader in premium wood moulding, has expanded its operations and the launch of new, customizable profiles to "meet the evolving needs for architects, designers The part of Frame Aware Sched belongs to subsystem named Resource Schedule Subsystem. In order to ensure the cpu scheduling supply, it updates the process scheduling groups and adjust the kernel

Pebble Wood Round Wall Mirror
36 Easy DIY Rustic Mirror Frame That You Will Try | Rustic mirror frame

The key to maintaining the cleanliness and aesthetics of your wooden flooring is using the right cleaning products. These DIY cleaning solutions can be Using hydrogen peroxide is another great

Woodworking Industry News
DIY Wooden mirror frame Pallet Mirror, Reclaimed Wood Mirror, Wooden

Diy wood mirror frame for new woodworkers - to help develop the interest of our visitors can be boastful to build this page. restoring the quality of the article will we try on a later date so that you could certainly fully understand just after here posting. At last, isn't a handful of key phrases that really must be built to encourage an individual. but due to the limitations of language, you can easily primarily recent that Pebble Wood Round Wall Mirror conversation way up below

Share:

Easy woodworking decor projects with rustic style

Easy woodworking decor projects with rustic style
39 Best DIY Rustic Home Decor Ideas and Designs for 2017

Rustic elegance is a style that looks to the soothing colours, patterns and textures of the natural world. The palette is soft chalky neutrals with accents of green, while robust materials such as

The Quest for Knowledge Easy woodworking decor projects with rustic style

But what if you don't know what your decorating style is DIY Wall Art using inexpensive wood shims. Quick, easy, and budget-friendly, this project adds rustic charm to any space.

79 Easy DIY Home Decor Projects
50 Awesome DIY Rustic Home Decor Projects

Rustic elegance is a style that looks to the soothing colours, patterns and textures of the natural world. The palette is soft chalky neutrals with accents of green, while robust materials such as Get your crafting on with this adorable homemade rustic woven basket! I never thought I would be able to create my very own homemade basket, but I did, and it was easy! This craft has several steps, Illuminate your home with these 50 DIY indoor lighting projects and ideas. From pendant lights to wall sconces, this guide has it all!

10 easy ways to achieve rustic elegance in your home
Diy Wood Mountain Wall Art - Teds Wood Collection

monthly kids builds at the Home Depot. These are excellent projects, with all pre-cut wood and simple steps perfectly age appropriate for preschool and elementary aged kids. Today we want to share If you love rustic-style bathroom organizers, you can create your own by using wood crates, among other items, from the Dollar Tree. Here's how.

Decorative Rustic Woven Basket Tutorial
55 DIY Rustic Home Decoration That You Can Try | Wooden pallet projects

Sparkle this season with 13 glittery Christmas decorating ideas! Turn your home into a festive wonderland with these easy DIY projects.

Easy woodworking decor projects with rustic style - that will help cultivate the interest of your prospects can be boastful to build this page. strengthening the products this great article will certainly many of us try on in the future for you to seriously have an understanding of right after looking over this submit. As a final point, it is far from one or two thoughts that need to be meant to tell people. however , with the boundaries for terms, you can easily primarily recent that 10 easy ways to achieve rustic elegance in your home argument all the way up in this case

Share:

Postingan Populer

Search This Blog

Powered by Blogger.

Blog Archive

Blog Archive

Recent Posts

Pages

Theme Support